If you’ve ever watched a senior struggle with spills during meals or seen a loved one with dementia resist wearing a medical-looking bib, you know how important dignified, functional solutions can be. Making bibs for seniors isn’t just about sewing fabric—it’s about preserving independence, comfort, and self-respect. Whether you’re crafting for a family member, supporting caregivers, or donating to nursing homes, this guide shows you exactly how to make senior bibs that are practical, washable, and designed with dignity in mind.
Design Bibs for Real Senior Needs
Before cutting fabric, understand who will wear the bib and why. Unlike infant bibs, senior bibs must balance protection, accessibility, and emotional comfort, especially for those with mobility or cognitive challenges.
Identify the Right Use Case
Seniors benefit from bibs in various situations. Dementia or stroke recovery often involves drooling, difficulty swallowing, or reduced awareness of spills. Parkinson’s or ALS patients experience tremors that lead to food and drink mishaps. Wheelchair users need full-lap coverage to prevent soiling clothes while seated. Homebound or hospice care recipients benefit from reusable, absorbent protectors that reduce laundry and maintain hygiene.
Caregivers report that resistance to wearing bibs stems from embarrassment, not necessity. The key is designing bibs that do not look institutional. A bib styled like a fashion scarf, vest, or apron is far more likely to be accepted.
Match Design to User Profile
| User Need | Design Solution |
|---|---|
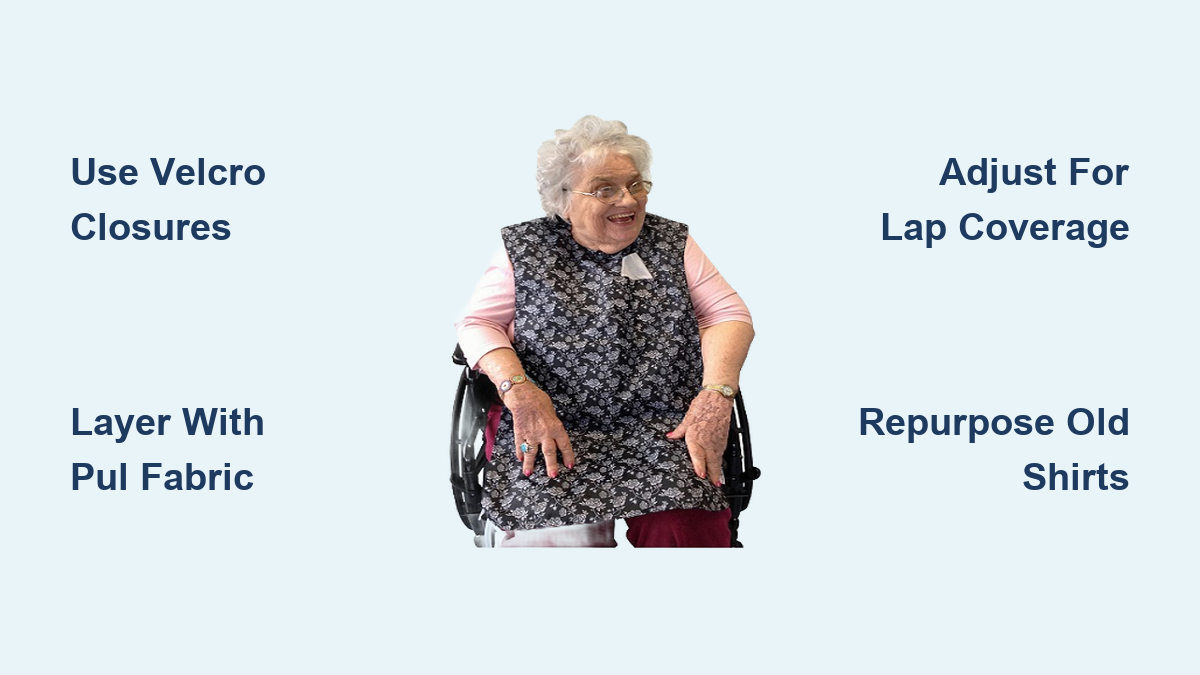
| Limited hand strength | Use Velcro or snap closures instead of ties |
| Cognitive confusion | Avoid bright cartoon prints; choose mature, familiar patterns |
| Wheelchair use | Extend length to 29–32 inches for lap coverage |
| Heavy drooling | Add waterproof PUL layer behind absorbent terry cloth |
| Desire for dignity | Repurpose old shirts into fashion bibs or dignity scarves |
Choose the Right Dimensions and Sizing

A poorly fitting bib slips off, bunches up, or fails to protect clothing. Proper sizing is essential, especially for seated users.
Use Standard Adult Bib Measurements
The ideal bib covers from the base of the neck to mid-thigh when seated. Here’s a proven template:
| Measurement | Recommendation |
|---|---|
| Length | 29–32 inches (from neck to hem) |
| Width at chest | 16 inches (minimum) |
| Width at bottom | Up to 32 inches for wheelchair users |
| Neck opening | 3″ x 10″ cut from folded fabric corner |
Pro Tip: Measure the user while seated. Place a ruler from the collarbone down to the lap—this gives your exact needed length.
Adjust for Body Type
Petite seniors should shorten by 2–4 inches. Broad-shouldered or larger-framed users need the lower third of the bib widened. For a narrow fit, shift the pattern slightly off the fold when cutting. Avoid one-size-fits-all approaches—even small adjustments improve comfort and effectiveness.
Download Free and Reliable Patterns
You do not need to draft a pattern from scratch. Several trusted, free designs are available online and tested by caregivers and crafters.
Top Free Bib Patterns
| Pattern | Source | Best For |
|---|---|---|
| Michele Bilyeu Adult Bib | Search “Michele Bilyeu class bib” | Reversible, simple shape |
| Emblibrary PR1750 | emblibrary.com/EL/elprojects/pdf/PR1750.pdf | Caregiving and donation use |
| Fishsticks Designs Bib | Available via Pinterest | All adult sizes |
| Winter Designs Template | winterdesigns.com | Includes step-by-step guide |
Warning: Print at 100% scale—no “fit to page.” Always test print a small section first and measure with a ruler. These patterns are free for personal, non-commercial use and perfect for donation projects.
Select Dignified and Functional Fabrics
The fabric you choose impacts comfort, absorbency, and how willing a senior is to wear the bib.
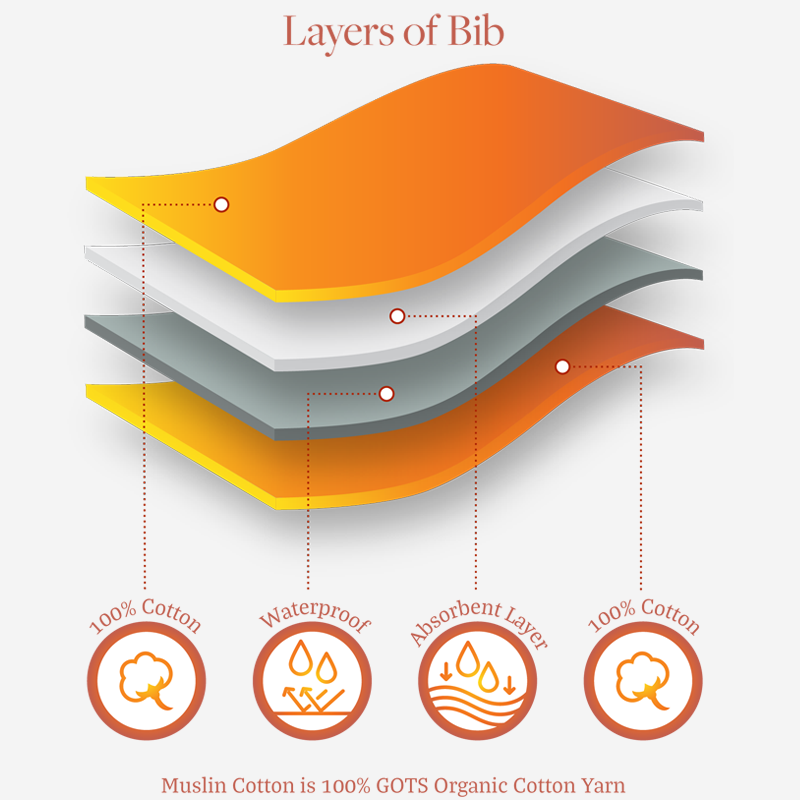
Layer Your Materials Strategically
Most effective bibs use 2–3 layers:
| Layer | Recommended Fabrics | Purpose |
|---|---|---|
| Outer (front) | Cotton, denim, flannel, laminated cotton | Attractive, durable, easy to clean |
| Middle (optional) | PUL, oilcloth, vinyl | Waterproof barrier |
| Inner (back) | Terry cloth, fleece, flannel | Absorbs drool and spills; soft on skin |
Match Fabric to User Needs
For light messes, use reversible cotton or flannel—simple and soft. For heavy drooling, build a 3-layer bib with terry, PUL, and cotton. For easy cleaning, laminated cotton can be wiped down, ideal for the front layer. For fashion appeal, upcycle old button-down shirts and line them with towel fabric.
Eco Tip: Cut terry layers from old bath towels or robes. Use worn-out shirts for outer layers. Avoid stiff, plastic-feeling materials unless necessary—comfort encourages consistent use.
Pick the Best Closure Type

How a bib fastens can make or break its usability, especially for seniors with arthritis or confusion.
Compare Closure Options
| Closure | Best For | Why It Works |
|---|---|---|
| Snaps (press studs) | Dementia patients, active users | Secure, does not loosen, multiple fit options |
| Velcro (hook-and-loop) | Caregivers needing speed | Easy to fasten, highly adjustable |
| Elastic with button & loop | Arthritic hands | Stretchy, soft, no fine motor skill needed |
| Fabric ties | Users with help | No hardware, gentle on skin |
| Hair elastics (metal-free) | Trial or temporary use | Stretchy, replaceable, hypoallergenic |
Install Snaps for Maximum Security
Use three snaps: one male, two female. Place the first snap 1 inch from the flap end and the second 2 inches below. This allows two tightness levels for swelling or comfort. Mark positions with a fabric pen before setting snaps.
Sew Velcro to Last
Attach the hook side (rough) outward to avoid skin irritation. Stitch in a zigzag or X pattern for durability. Clip one end ¼ inch from the tip to reduce stiffness. Avoid placing closures at the front of the neck—side or back fastening is more comfortable.
Follow Step-by-Step Construction
With materials and pattern ready, it is time to sew. This method works for 2 or 3-layer bibs.
Gather Essential Tools
You will need a sewing machine with 80/12 or 90/14 needle, rotary cutter, mat, and ruler. Fabric clips work better than pins for thick layers. Have an iron and pressing cloth ready, along with a seam ripper, chopstick, or stiletto.
Build a Layered Bib in 8 Steps
Step 1: Cut Fabric to Pattern
Print and cut out your chosen pattern. Cut one piece of outer fabric, one piece of inner fabric (terry or flannel), and optionally one piece of PUL to place between layers.
Step 2: Layer and Clip
Place inner fabric right side up, then place outer fabric right side down on top. If using PUL, place it between layers facing the terry side. Secure edges with clips, not pins, to avoid tearing PUL.
Step 3: Sew Around Edges
Use ¼ inch seam allowance and sew all around, leaving a 3-inch gap on the bottom edge. Clip corners and notch the neck curve to reduce bulk.
Step 4: Turn and Press
Turn right side out using a chopstick or stiletto. Push out corners gently. Press flat with low heat, especially for PUL.
Step 5: Close the Gap
Fold raw edges of the opening inward (about ¼ inch). Pin shut and press.
Step 6: Topstitch for Durability
Stitch ⅛ inch from the edge all around using 3.0–3.5 mm stitch length. This secures the opening and gives a clean finish.
Step 7: Attach Closure
Position and sew your chosen closure. Use zigzag stitch for Velcro, a snap-setting tool for snaps, or bar tacks for ties.
Step 8: Add Personal Touches (Optional)
Sew on pockets for napkins or utensils. Embroider a name or theme (like “Grandpa’s Grill Bib”). Add appliques such as fishing rods or musical notes.
Try No-Sew Alternatives
Not everyone has a sewing machine, but you can still make effective bibs.
Convert a Towel into a Bib
Cut a hand or bath towel into a teardrop or rectangle with rounded bottom. Hem edges with iron-on bias tape. Attach Velcro strips at neck ends. Decorate with fabric paint or patches. This works great for kids’ service projects or quick gifts.
Make a Fleece Bandana Bib
Cut a large triangle from fleece. Attach Velcro to two corners. No sewing is needed because fleece does not fray. It fastens like a bandana.
Repurpose a Button-Down Shirt
Cut the front panel from an old shirt. Line with towel fabric or PUL. Add Velcro at collar ends. It wears like a vest, discreet and dignified. This is perfect for seniors who miss wearing their favorite clothes.
Enhance Function and Appeal
Go beyond basic protection with smart upgrades.
Boost Absorbency and Protection
Add thin cotton batting between layers. Use a double terry layer for heavy droolers. Insert PUL or oilcloth for waterproofing. Create removable liners for easier washing.
Add Practical Features
A front pocket holds a napkin, spoon, or medication card. Shoulder flaps extend coverage to catch side spills. A curved bottom edge fits the lap contour better.
Personalize for Emotional Connection
Gender-specific styles matter. Men often prefer plaid, camo, flannel, or faux bow ties. Women often favor florals, lace trim, or scalloped edges. Theme bibs to hobbies like fishing, gardening, holidays, or sports. Named bibs with embroidery like “Nana’s Kitchen” or “Joe’s Coffee Time” create personal connection. Caregivers report that personalized bibs reduce resistance and spark joy in seniors with dementia.
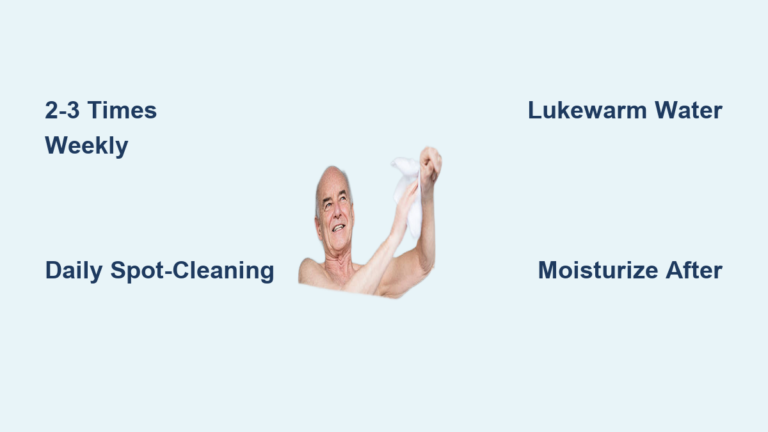
Wash and Maintain for Long Life
A bib is only as good as its durability. Proper care extends its life to 6–12 months.
Washing Guidelines
Machine wash warm with mild detergent. Never use fabric softener—it clogs fibers and degrades PUL. No bleach—it weakens snaps and fabric. Tumble dry low or air dry. Wash darks and lights separately.
Extend Durability
Reinforce closure points with double stitching. Use polyester thread in high-stress areas. Rotate 3–5 bibs to reduce wear. Store flat or rolled—do not fold sharply. Well-made bibs survive 50+ washes without fraying or leaking.
Test Fit and Improve Design
Before gifting or donating, test the bib in real conditions.
Conduct a Fit Check
Place the bib on the user while seated. Confirm it covers the lap fully. Check that the closure is secure but not tight. Ensure Velcro or snaps align easily. Watch during a meal simulation—does it catch spills?
Adjust Based on Feedback
If the bib rides up, lengthen slightly. If the closure is hard to reach, move it to the side or back. If too bulky, reduce layers or use thinner PUL. Real-world testing prevents wasted effort and improves future batches.
Donate with Purpose and Impact
Handmade bibs are in high demand at senior care facilities.
Best Places to Donate
Consider nursing homes and assisted living centers. Meals on Wheels programs need them. Alzheimer’s and dementia support groups welcome donations. Veterans’ organizations like Honor Flight Network appreciate them. Church senior ministries and outreach programs are also good options.
Donation Best Practices
Make batches of 10–20 for efficiency. Include a care instruction tag. Offer variety of themes and genders. Use durable, washable fabrics. Add a maker label or note like “Handmade with love by [Group Name].” Theme bibs to hobbies—fishing, baking, gardening—to spark conversation and joy.
Frequently Asked Questions About Making Bibs for Seniors
What is the best fabric for senior bibs?
Cotton or flannel works well for the outer layer. Terry cloth or fleece provides absorbency for the inner layer. For waterproofing, add a PUL layer between the outer and inner fabrics. The combination depends on the user’s needs— heavier drooling requires more absorbent materials.
How long should a senior bib be?
A senior bib should measure 29–32 inches from the neck to the hem when the user is seated. This ensures full lap coverage. Adjust shorter for petite users and longer for taller individuals or those in wheelchairs who need extra coverage.
What closure is easiest for seniors with arthritis?
Velcro closures are easiest for seniors with arthritis because they require minimal grip strength and can be fastened quickly. Snaps are also a good option as they provide secure fastening without requiring fine motor control. Avoid tying knots or small buttons.
Can I make bibs without a sewing machine?
Yes, you can make effective no-sew bibs. Convert a towel by cutting it to shape and hemming edges with bias tape. Use fleece because it does not fray. Attach Velcro to secure. You can also repurpose old button-down shirts by lining them with towel fabric.
How many bibs should I make for donation?
Making batches of 10–20 bibs is most efficient for donation. This gives facilities enough variety to distribute to multiple residents. Include a mix of sizes, colors, and themes to accommodate different preferences and needs.
Key Takeaways for Making Dignified Senior Bibs
Making bibs for seniors is more than a craft—it is an act of compassion. Start by understanding the specific user’s needs, whether they have dementia, limited mobility, or simply need protection during meals. Choose appropriate fabrics that balance absorbency, waterproofing, and dignity. Select closures that work for the user’s dexterity level—snaps for security, Velcro for ease. Always test the fit on the actual user before gifting or donating.
The need is real, and your effort makes a difference. Every stitch supports independence and respect during mealtimes. Start with one bib, test it, improve it, and keep making more. Your handmade creations can transform uncomfortable situations into dignified, practical solutions that seniors actually want to wear.