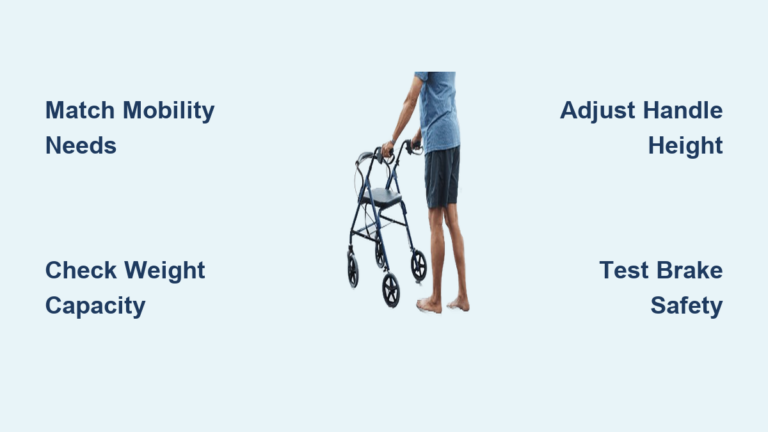
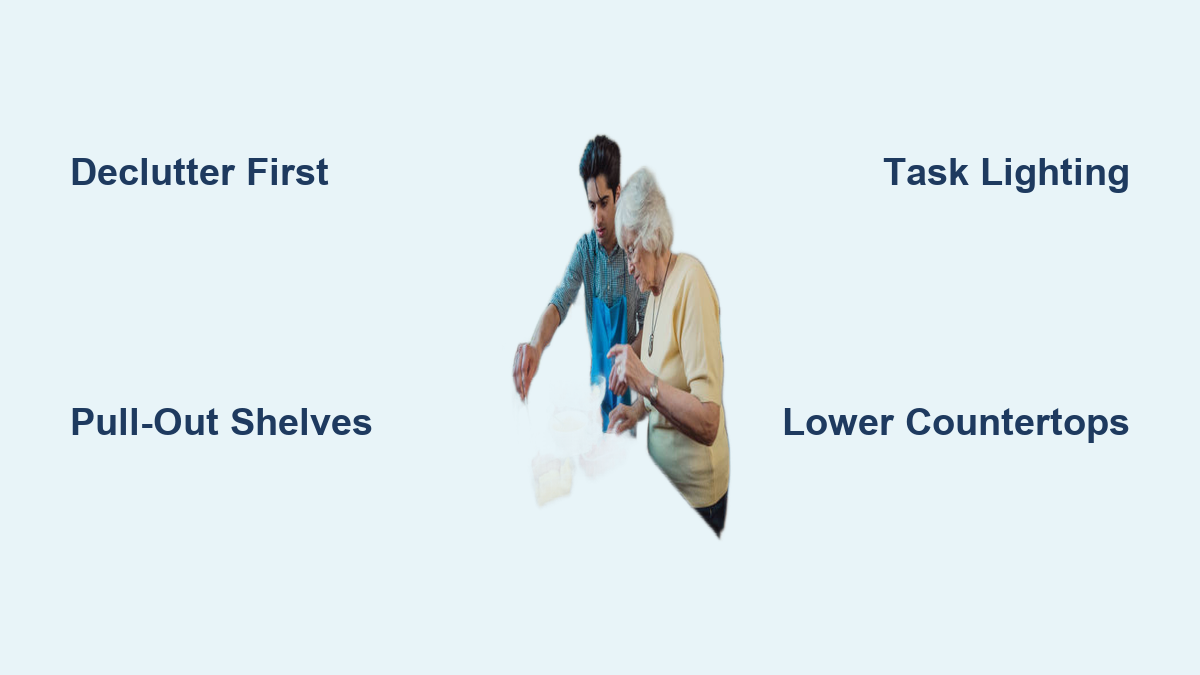
A cluttered, hard-to-navigate kitchen can quickly become a source of frustration and danger for older adults. For seniors living independently, even simple tasks like making coffee or heating a meal can turn into physical challenges due to mobility issues, vision changes, or memory lapses. But with thoughtful organization, any kitchen can be transformed into a safe, accessible, and empowering space that supports aging in place.
Organizing a kitchen for the elderly is not about creating a clinical space. It is about designing a safe, functional, and joyful environment that preserves independence and dignity. This guide delivers actionable strategies to make meal prep easier, safer, and more enjoyable. You will learn how to declutter effectively, optimize storage, improve lighting, choose senior-friendly appliances, and adapt your layout.
Optimize the Kitchen Work Triangle
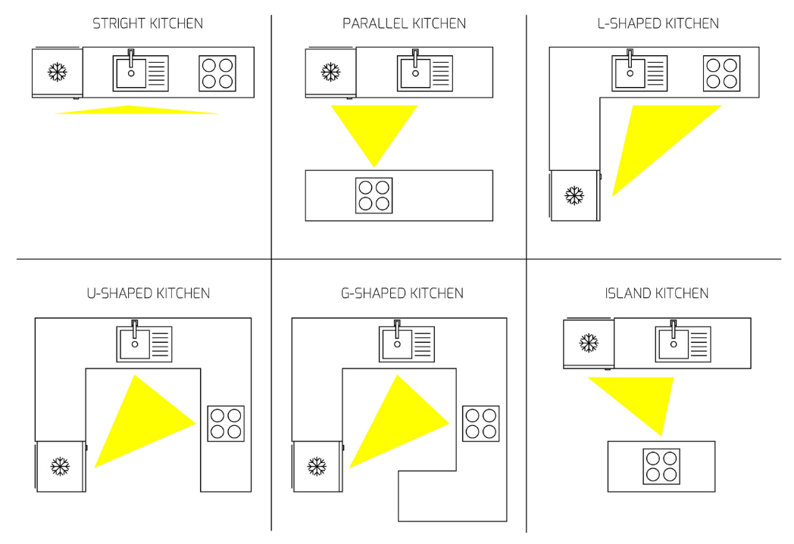
The refrigerator, sink, and stove form the kitchen work triangle, the core path used most during cooking. For elderly users, this area must be efficient and safe.
Shorten Walking Paths Between Key Areas
Minimize the distance between the three main zones. Long trips with hot or heavy items increase fall risk and joint strain. Rearrange appliances so no leg of the triangle exceeds 9 feet, and keep the total perimeter under 26 feet.
Ensure Open Floor Space
Allow at least 36 inches of clearance around each appliance. Wheelchair users need 60 inches of turning radius near key areas. Remove obstacles like rolling carts, trash cans, or stools from high-traffic routes.
Avoid Overhead Obstructions
Do not force reaching across hot burners to open upper cabinets. Position frequently used items within easy reach between waist and eye level, and keep pathways free above countertops.
Maximize Accessible Storage Solutions
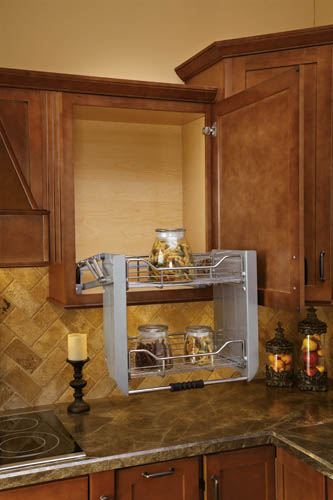
Storage design directly impacts independence. Poorly placed or deep cabinets lead to falls, frustration, and unused kitchens.
Install Pull-Out Shelves and Drawers
Replace standard hinged doors with full-extension drawer systems. Pull-out shelves let users see and reach everything without bending or digging. Install them in base cabinets, pantries, and under sinks.
Use Lazy Susans in Corner Cabinets
Blind corner cabinets are notoriously hard to access. Use rotating turntables, especially transparent ones, for spices, oils, or canned goods. This eliminates awkward reaching and wasted space.
Add Lowerable Pull-Down Shelves
For upper cabinets, use spring-assisted or motorized pull-down shelves. These bring contents down with minimal effort, ideal for those with limited shoulder mobility.
Choose Drawers Over Cabinets
Wide drawers over 30 inches store large pots and baking sheets flat, making them easier to access than deep cupboards. Soft-close mechanisms prevent slamming and protect fingers.
Label Everything Clearly
Use large-print, high-contrast labels (black on white or yellow) on bins and containers. For those with severe vision loss, consider braille labels or tactile markers. Picture labels help individuals with dementia identify contents.
Reduce Bending and Reaching Movements
Every unnecessary bend or stretch increases strain on aging joints. Smart organization minimizes these movements.
Store Daily Items at Waist Level
Keep plates, mugs, utensils, and cooking tools between waist and chest height. Rarely used items like holiday dishes or deep fryers can go higher or lower.
Limit Dishware to Essentials
Downsize to 2-3 place settings per person. Fewer items mean less clutter, easier cleaning, and reduced risk of dropping heavy stacks.
Use a Reacher Tool
A lightweight grabber tool with up to 5 lb capacity retrieves items from high shelves or deep cabinets safely. It is a low-cost solution that extends reach without ladders or stepping stools.
Install Countertop Extensions
For seated users, add flip-up or retractable countertop sections. These provide extra workspace and allow meal prep while sitting, reducing fatigue during long tasks.
Upgrade Appliances for Safety and Ease
Modern appliances can enhance safety and usability when selected and placed thoughtfully.
Choose Induction Cooktops
Induction stoves heat only when a pan is present and cool quickly after removal. They reduce burn risk and often include auto-shutoff timers, front-mounted controls, and visual heat indicators, ideal for forgetful or vision-impaired users.
Position Microwaves at Counter Height
Avoid over-the-range models. Install drawer microwaves in lower cabinets or place countertop units on pull-out shelves between 24 and 48 inches from the floor. This prevents overhead reaching and spill hazards.
Opt for Front-Control Ranges
Knobs or controls on the front panel eliminate the need to reach over hot burners, critical for safety and accessibility.
Select Side-by-Side Refrigerators
Avoid bottom-freezer models that require frequent squatting. French door or side-by-side fridges offer easier access. Some models feature internal cameras so users can see contents without opening the door.
Use Dishwashers with Front Controls
Top-mounted controls force awkward bending. Choose models with controls on the front edge, visible and operable while standing.
Improve Lighting and Visibility
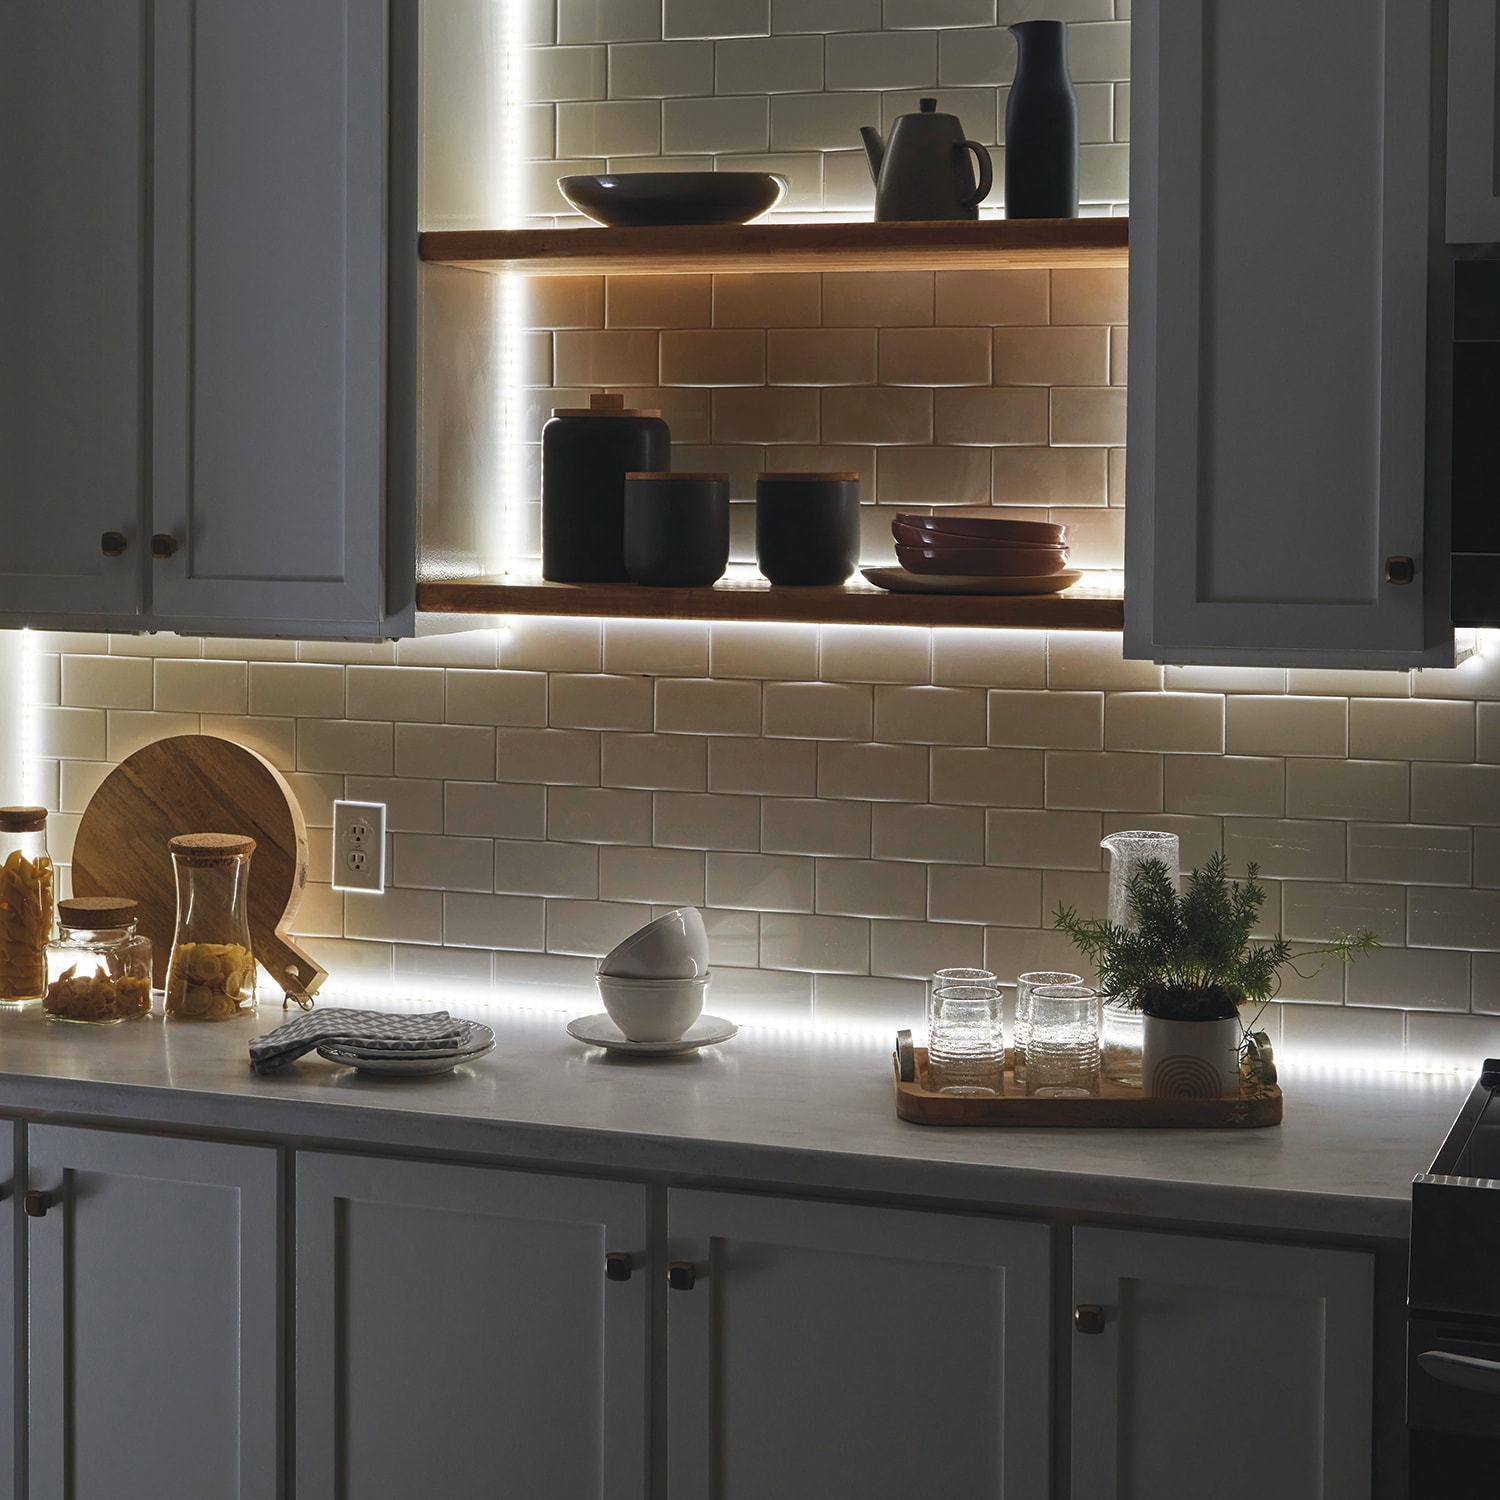
Poor lighting contributes to mistakes, spills, and falls, especially for seniors with cataracts or macular degeneration.
Add Under-Cabinet Task Lighting
Install LED strip lights beneath upper cabinets to eliminate shadows on countertops. This improves visibility during food prep and reduces error risk.
Use Motion-Activated Lights
Place motion-sensor lights inside cabinets, pantries, and drawers. They turn on automatically when opened, helping users with low vision or memory issues.
Layer Your Lighting Approach
Combine overhead lighting with focused task lights (pendants over islands) and accent lights (interior cabinet lighting). Use dimmable fixtures with adjustable color temperatures, cooler for cooking and warmer for evenings.
Install High-Contrast Switches
Use rocker switches with glow-in-the-dark plates or backlit toggles. Label each switch clearly in large print to prevent confusion.
Prevent Slips, Trips, and Falls
Kitchens have multiple fall risks including wet floors, clutter, and uneven surfaces. Mitigate them proactively.
Choose Non-Slip Flooring
Select textured porcelain tile, vinyl plank, cork, or rubber flooring for slip resistance and comfort underfoot. Avoid glossy finishes that create glare.
Eliminate Rugs and Thresholds
Remove area rugs and ensure seamless transitions between rooms. Use ramps instead of steps where needed. Smooth, level flooring prevents tripping, especially for walker or cane users.
Round Off Sharp Edges
Use countertops with rounded or eased edges. Soften corners on islands and open shelving to reduce injury risk during movement.
Keep Counters Clutter-Free
Clear countertops of unused appliances and small tools. Only keep daily-use items out. Less clutter means more workspace and fewer tripping hazards.
Simplify with Adaptive Tools
Small tools make a big difference in maintaining independence.
Use Ergonomic Utensils
Choose utensils with padded, non-slip handles, built-up grips, or angled heads. These reduce hand strain for those with arthritis or tremors.
Switch to Lightweight Cookware
Replace heavy cast iron or stainless steel pots with lightweight non-stick alternatives. Easier to lift and maneuver, especially when full.
Install Hands-Free Faucets
Motion-sensor faucets reduce effort and improve hygiene. Pair with a single-lever handle for one-handed operation and anti-scald protection set to 120°F.
Add a Pot Filler Faucet
Mount a pot filler behind the stove to fill kettles and pots directly. Eliminates carrying heavy, water-filled containers across the kitchen, reducing spill and burn risks.
Use Wall-Mounted Jar Openers
These assist users with weak hands. Simply twist the jar against the mounted tool to open lids effortlessly.
Support Cognitive Function and Memory
Memory lapses can lead to unattended stoves or spoiled food. Simple systems prevent accidents.
Post a Kitchen Whiteboard
Place a whiteboard in a visible spot like the hallway or fridge door. Write down tasks before entering the kitchen. It acts as a real-time reminder system.
Set Voice Reminders
Use smart speakers like Alexa or Google Home to set timers and safety alerts. Examples include reminders to check the oven or turn off burners.
Label Food with Expiry Dates
Use a Sharpie to write purchase or expiry dates on containers. Apply sticky labels to leftovers with contents and date. This prevents food waste and illness.
Organize by Use Zones
Group items by activity. Create a beverage station with mugs and coffee supplies, a baking zone with measuring cups and bowls, a cooking hub with pots and spices, and a snack drawer with pre-portioned items. This reduces decision fatigue and helps users find what they need quickly.
Personalize the Kitchen Layout
No two seniors have identical needs. Customize based on current abilities and future planning.
Assess Mobility Needs First
Is the user walking freely, using a cane, or in a wheelchair? Adjust countertop heights accordingly. Standard height is 36 inches, but wheelchair-accessible areas should be 28-30 inches with knee clearance.
Prioritize Frequently Used Zones
If baking is a favorite activity, ensure mixing bowls, flour, and pans are within easy reach. If tea is consumed daily, create a dedicated tea station.
Involve the Senior in Decisions
Let the individual choose colors, labels, and storage solutions. Ownership increases comfort and long-term use.
Plan for Future Changes
Choose modular systems like adjustable shelves or removable cabinet bases that can adapt as needs evolve. Think ahead about wheelchair access and support options.
Make Low-Cost, High-Impact Upgrades
You do not need a full remodel to improve kitchen safety and usability.
Start with Decluttering
Go through every cabinet, drawer, and pantry shelf. Ask whether each item is used weekly. Donate duplicates, expired food, and unused gadgets. Less clutter equals a safer environment.
Replace Cabinet Hardware
Swap small knobs for D-shaped or lever-style pulls. These are easier to grip for arthritic hands and reduce strain.
Add Clear, Airtight Containers
Transfer dry goods like flour, sugar, and pasta into clear, labeled bins. This improves visibility, keeps food fresh, and simplifies cleaning.
Install a Support Stool
Place a sturdy, back-supported stool near the prep area. It allows seated cooking, reducing fatigue during long tasks.
Use Color-Coding
Assign colors to different users or diets. Blue bins for one person and green for another helps prevent mix-ups, especially in shared homes.
Work with Professionals When Needed
For major changes, expert input ensures safety and long-term value.
Consult Universal Design Experts
Firms like Art of Drawers or Roeser Home Remodeling specialize in aging-in-place kitchens. They offer free consultations and custom solutions like pull-out pantries, accessible islands, and smart storage.
Hire an Occupational Therapist
An occupational therapist can assess the user is physical and cognitive abilities and recommend personalized modifications from reacher tools to workflow adjustments.
Get Structural Advice
Before removing walls or changing layouts, consult a contractor. Open-concept designs improve visibility and flow but require load-bearing evaluations.
Key Takeaways for Organizing Your Kitchen for the Elderly
Organizing a kitchen for the elderly is a journey, not a one-time project. Begin with decluttering and lighting, two low-cost changes that deliver immediate benefits. Then phase in larger upgrades like pull-out shelves, ergonomic hardware, and senior-friendly appliances as needed.
The goal is not perfection. It is independence. A well-organized kitchen empowers seniors to cook, connect, and care for themselves with dignity. Whether it is a labeled spice drawer or a full induction cooktop, every change builds confidence and safety.
By planning early and adapting thoughtfully, you create more than a functional kitchen. You create a space where aging is met with support, not limitation. Start with one change today, and build toward a safer, more accessible kitchen that serves your needs for years to come.
Frequently Asked Questions About Organizing a Kitchen for the Elderly
What is the most important change to make first?
Start with decluttering and improving lighting. These low-cost upgrades have an immediate impact on safety and usability. Remove unused items, then add under-cabinet lighting and motion-sensor lights in dark areas.
How much does it cost to adapt a kitchen for elderly use?
Costs vary widely. Simple updates like replacing hardware, adding labels, and installing LED strips can cost under $200. Full remodels with custom pull-out systems and accessible appliances run significantly higher. Many upgrades can be done incrementally over time.
What countertop height is best for wheelchair users?
Wheelchair-accessible countertops should be 28-30 inches high with at least 27 inches of knee clearance underneath. This allows users to sit comfortably while preparing food.
Are induction cooktops safer for seniors?
Yes. Induction cooktops only heat when a pan is placed on the surface and cool quickly after removal. They include auto-shutoff features and visual heat indicators, making them ideal for users with memory issues or vision impairments.
Should I hire a professional to assess my kitchen?
For major modifications, consulting an occupational therapist or universal design specialist is valuable. They can recommend personalized solutions based on specific mobility, vision, or cognitive needs. Many companies offer free consultations.
Can I make changes without a full remodel?
Absolutely. Many improvements do not require construction. Add pull-out shelf inserts, replace knobs with lever pulls, install a motion-sensor faucet, use clear containers with labels, and add a support stool. These changes enhance accessibility without major renovation.