Struggling to stand from a seated position is one of the most common mobility challenges among older adults. For many seniors, a chair that’s too low, too soft, or lacking arm support can make independent movement nearly impossible, leading to falls, frustration, and loss of confidence. The good news is you don’t need to buy new furniture to fix this. How to raise a chair for elderly users involves practical, affordable, and often immediate solutions, from DIY wood blocks to portable lift cushions.
The key is aligning the hips above or level with the knees, reducing strain on weakened leg muscles and stiff joints. Whether you’re helping a parent, grandparent, or aging in place yourself, this guide delivers actionable methods, safety tips, and expert-recommended tools to elevate any chair safely. You’ll learn how to modify existing seating, choose the right assistive device, and support independence without breaking the bank.
Optimize Chair Height for Seniors
The foundation of safe standing is proper seat height. A chair that’s just 2 inches too low can double the effort required to rise.
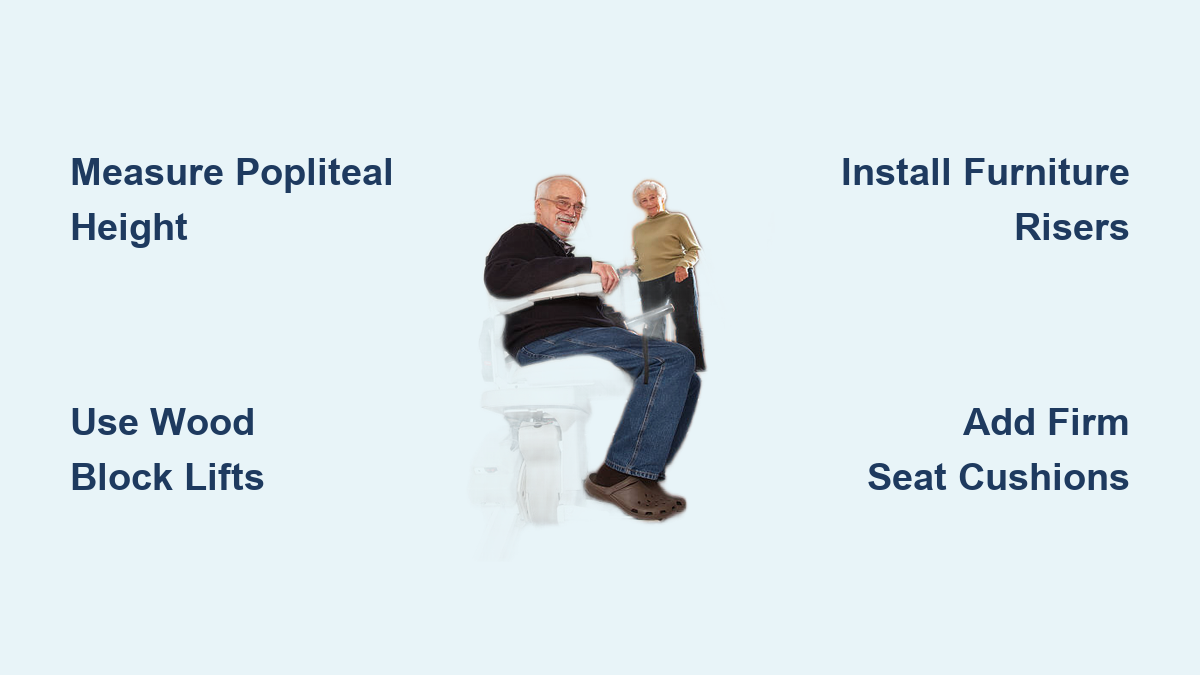
Measure Popliteal Height Correctly
This is the distance from the floor to the back of the knee when seated. Follow these steps:
- Have the person sit in a firm chair with feet flat on the floor.
- Slide a ruler or measuring tape under the thigh, touching the floor.
- Measure from the floor to the crease behind the knee.
- Choose a seat height that matches or is 1 inch higher than this number.
Example: If popliteal height is 18 inches, the ideal seat height is 18 to 19 inches. Ensure feet rest flat and arms can grip armrests at elbow level when seated.
Avoid Common Chair Hazards
Watch out for these problematic chair features that increase fall risk:
• Low seats under 17 inches: Force forward lean and increase instability.
• Deep, soft cushions: Collapse under weight and trap the pelvis.
• Missing armrests: Remove critical leverage for standing.
• Wobbly legs or casters: Shift during transfer and cause imbalance.
Replace or modify chairs with these flaws before relying on lifts or risers.
DIY Wood Block Chair Lifts for 3.5-Inch Boost
A no-cost, sturdy way to raise recliners or dining chairs using scrap lumber.
Cut and Attach 2×4 Blocks
Use pressure-treated or sanded wood to avoid splinters.
- Measure chair rails: Cut two 2×4 pieces to match front and back rail lengths.
- Drill countersunk holes: Use a 3/8-inch Forstner bit so screw heads sit flush.
- Secure blocks under rails: Position one block under front rail and fasten with 3-inch screws. Repeat for back rail.
- Add middle screw for extra stability, especially on long rails.
- Sand edges smooth and apply paint or sealant if desired.
Do not use on plastic, hollow metal, or cracked legs. They may not support added stress and could fail during use.
Maximize Safety After Installation
Take these steps to ensure stability:
• Place non-slip rug pads under the chair to prevent sliding.
• Check weekly for wood warping or loosened screws.
• Test stability by slowly lowering into the chair with full body weight.
This method raises the seat by 3.5 inches, significantly reducing knee strain and making standing easier.
Build a Custom Platform Riser for Up to 4 Inches

Ideal for heavy or oddly shaped chairs that commercial risers won’t fit.
Assemble a Sturdy Base
Gather these materials:
• ¾-inch plywood cut to chair footprint
• 2×4 lumber for underframe support
• 1×1 wood strip for perimeter lip
• Rubber shelf liner for top
• Rubber floor mat for bottom
Steps:
- Cut plywood to match chair base dimensions.
- Screw 2×4s underneath for reinforcement.
- Nail 1×1 strip around top edge to prevent slipping.
- Glue anti-slip liner to top surface.
- Attach rubber mat to bottom.
Tip: For carpeted floors, add felt pads to reduce friction and protect flooring.
Test and Maintain the Platform
• Load test with full body weight before regular use.
• Re-check weekly, especially on plush carpet, since platforms can shift.
• Replace worn rubber every 6 to 12 months.
This solution provides up to 4 inches of lift and works with recliners, sofas, or dining sets.
Use Furniture Risers for 1 to 3 Inch Elevation
Quick, removable, and effective for most standard chairs.
Choose the Right Riser Type
Select based on your needs:
• Stackable plastic: Best for budget users and temporary needs, offering 1 to 3 inches.
• Wooden risers: Offer aesthetic appeal and durability, 2 to 3 inches.
• Adjustable risers: Allow fine-tuned fit, 1.5 to 3.5 inches.
• Mobilis-style: Grip round, square, or splayed legs, 2 to 3 inches.
Installation tips:
• Raise all four legs evenly.
• Ensure chair legs fit snugly into riser recesses.
• Use risers with non-slip tops and bottoms.
• Avoid stacking more than two plastic risers, as tipping risk increases.
Weekly check: Wiggle the chair gently. If it shifts, replace or reposition risers. Most risers cost $20 to $50 and require zero tools.
Add Firm Seat Cushions for 1 to 3 Inch Lift
Portable height boosters ideal for minor elevation needs.
Select the Right Cushion
Choose based on these criteria:
• Firm foam or gel core: Enables push-off; avoid plush memory foam.
• Non-slip bottom: Prevents shifting during use.
• Washable cover: Easy cleaning for incontinence or spills.
• Thickness: 1, 2, or 3 inches; choose based on popliteal measurement.
Never use soft, sinking cushions. They increase difficulty by making it harder to generate leverage. Place on dining, office, or occasional chairs for quick improvement.
Upgrade to Adjustable Height Chairs
No modifications needed. Simply dial in the perfect seat height.
Recommended Models
• Eden High-Back Armchair: Height-adjustable legs with lumbar support.
• Deluxe Hip Chair: Elevated seat with thick padding and footrest, ideal post-surgery.
These chairs let you customize height to match the user’s leg length, then raise slightly for standing leverage.
Pro tip: Adjust the chair while the user is seated to ensure feet stay flat and arms rest comfortably on armrests. Best for long-term use in living rooms, dining areas, or home offices.
Try a Perching Stool for Semi-Seated Support
Reduces fatigue during kitchen, laundry, or bathroom tasks.
Use the Versa Adjustable Perching Stool
This stool offers:
• Height adjusts from 18 to 24 inches.
• Slight forward tilt aligns pelvis and reduces lower back strain.
• Lightweight and portable design.
Encourages active posture while allowing brief rest, ideal for seniors who stand for long periods. Occupational therapists recommend these for task-specific seating where full sitting isn’t needed.
Portable Lift Assist Devices for No Furniture Changes
For seniors with weak legs or joint pain, powered cushions provide mechanical help without replacing furniture.
SitnStand Chair Lift Assist
The top-rated portable lift cushion works with any chair.
Key benefits:
• Rechargeable battery: Lasts 4 to 7 days.
• 4 height settings: Customizable lift range.
• Horizontal lift motion: Gently moves user forward and up.
• Weight capacity: 400 pounds.
• Portable: Use at home, in the car, or while traveling.
Does not recline. It functions only as a lift aid.
Setup in 3 steps:
- Place cushion on chair.
- Sit down and position hands on armrests.
- Press remote button to rise smoothly.
At $685, it’s far cheaper than a full lift recliner and usable across multiple chairs.
Compare Other Portable Lift Aids
Choose based on budget and features:
| Product | Price | Weight Capacity | Key Features |
|---|---|---|---|
| Assist-A-Tray | $219.99 | 300 lbs | Foldable, includes tray for meals or reading |
| EZ Stand-N-Go | $119.99 | 300 lbs | Two handles, easy install, travel-friendly |
| Able Life Universal Stand Assist | $114.99 | 300 lbs | Fits most armchairs, folds flat |
Choose based on budget, portability, and whether tray functionality is needed. Look for models with memory foam padding and non-slip bases.
Install a Power Lift Recliner for Permanent Solution
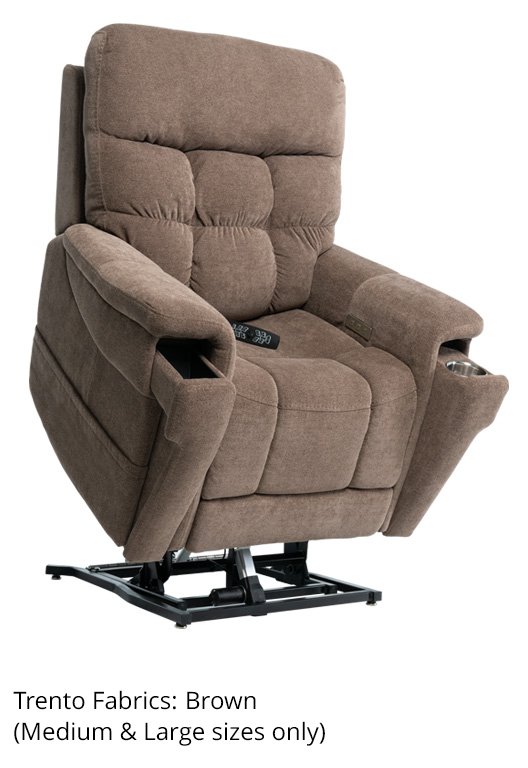
For maximum independence, nothing beats a full lift chair.
How Lift Recliners Work
- User sits down in the chair.
- Press the remote button.
- Chair tilts forward and lifts, bringing user to a standing position.
- Reverse the process to sit back down.
Includes recline, leg elevation, heat, and massage in higher-end models.
Top Models by Price and Support
| Model | Price | Features |
|---|---|---|
| Pride LC-105 2-Position | $839 | Entry-level, reliable |
| Pride LC-250 3-Position | $1,039 | Mid-range comfort |
| Pride VivaLift! Metro 2 | $1,321 | Modern design, smooth operation |
| Golden Cloud PR-510 | $1,899 | Premium cushioning, durable |
| Pride Viva Lift Ultra | $2,414 | Top-tier ergonomics, full-body support |
Heavy-duty models support up to 500 pounds, ideal for bariatric users. Best for daily use in living rooms or bedrooms where independence is a priority.
Consider Adaptive Seating Systems
For complex needs like Parkinson’s, stroke recovery, or progressive arthritis.
Features of Adaptive Chairs
These chairs include:
• Powered height adjustment
• Tilt-in-space mechanism that shifts center of gravity forward
• Locking casters for stability
• Firm, adjustable armrests
• Modular back supports
Ideal when transfers are frequent and safety is critical. Used in homes, rehab centers, and assisted living facilities. These chairs cost $1,500 to $3,000 or more but offer unmatched support and reduce caregiver strain.
Master Caregiver Assistance Techniques
When devices aren’t available, proper technique prevents injury.
Pre-Stand Safety Checklist
Complete these checks before assisting:
• Check for dizziness, pain, or low blood pressure.
• Clear the path and lock chair wheels.
• Close footrests and position feet flat.
• Communicate clearly: “We’ll stand on 3. Ready? 1, 2, 3, stand!”
Guided Sit-to-Stand Steps
Follow this sequence:
- Scoot hips forward to edge of seat.
- Lean chest forward, keeping nose over toes.
- Place hands on armrests, not on caregiver’s shoulders.
- Push through legs and arms on the cue count.
- Caregiver guards at hips. Do not lift the person.
- Pause after standing to check balance.
Never pull from under the arms. This can damage shoulders. Practice regularly to build confidence and reduce fear of falling.
Teach Floor-to-Chair Recovery After a Fall
Essential knowledge for seniors and caregivers.
Step-by-Step Recovery
- Roll onto side, then up to hands and knees.
- Position a sturdy chair in front, back against wall.
- Assume half-kneel position: one knee up, one hand on chair.
- On count “Ready, 1, 2, 3,” push through front leg and hand.
- Bring second foot forward, pivot, and lower slowly.
- Rest and check for injury.
Keep cushions nearby to pad knees and hips during recovery. Practice this in a safe environment to build confidence.
Use Additional Assistive Devices
Enhance safety and independence beyond the chair.
Chair and Transfer Aids
• Security poles: Wall-mounted or freestanding grab bars.
• Transfer boards: Slide from bed to chair with proper training.
• Swivel cushions: Reduce twisting when exiting cars.
Mobility Tools
• Grabber reacher: Pick up items without bending.
• Leg lifter: Pull on pants or socks safely.
• Canes or walkers: Use only after standing and balance is confirmed.
Combine chair modifications with these tools for full-home accessibility.
Match Solutions to User Needs
Choose the right option based on mobility level and lifestyle.
| Need | Best Solution |
|---|---|
| Minor difficulty | Furniture risers or seat cushions |
| Arthritis or weak legs | SitnStand or 3-position lift recliner |
| Post-hip or knee surgery | SitnStand or adaptive chair |
| Multiple seating areas | Portable lift cushion |
| Maximum support | Full lift recliner like Viva Lift Ultra |
| Caregiver-assisted | Adaptive chair with locking casters |
For temporary needs, go portable. For daily use, invest in permanence.
Prioritize Safety, Independence, and Dignity
The right chair solution does more than prevent falls. It restores confidence.
• Train caregivers in safe transfer techniques.
• Measure seat height accurately. Don’t guess.
• Test all modifications before regular use.
• Involve the senior in choosing the solution. Autonomy matters.
Adaptive seating builds a safer routine around standing, walking, and daily tasks, supporting independence for the elderly and peace of mind for families. Whether you spend $0 on wood blocks or $2,400 on a lift recliner, the goal is the same: make sitting and standing safe, simple, and dignified.
Frequently Asked Questions About Raising Chairs for Elderly
What is the ideal chair height for elderly individuals?
The ideal chair height should match or be 1 inch higher than the user’s popliteal height, which is the measurement from the floor to the back of the knee when seated. This ensures feet rest flat on the floor and knees are at or slightly below hip level, making standing easier.
Are furniture risers safe for elderly chairs?
Yes, furniture risers are safe when installed correctly. Choose risers with non-slip tops and bottoms, ensure all four legs are raised evenly, and check stability weekly. Avoid stacking more than two plastic risers, as this increases tipping risk.
How much does a portable lift cushion cost?
Portable lift cushions like the SitnStand cost around $685. Less expensive options like the EZ Stand-N-Go start at approximately $120. These provide a middle ground between simple risers and full lift recliners.
Can I use a DIY wood block method on any chair?
No. The DIY 2×4 wood block method works best on sturdy chairs with solid wood frames. Do not use this method on chairs with plastic legs, hollow metal legs, or cracked legs, as they may not support the added stress.
What is the easiest way to raise a chair for temporary use?
Furniture risers or height-boosting seat cushions offer the quickest solution. Risers cost $20 to $50 and require no tools. Cushions cost $15 to $40 and are portable, making them ideal for temporary or multi-chair use.
Do lift chairs require special installation?
Power lift recliners require only a standard electrical outlet. They plug in like any household appliance and need no wall mounting or special installation. Simply place the chair where desired and connect the power cord.
Key Takeaways for Raising Chairs for Elderly
The most important factor in making a chair easier to stand from is proper seat height, which should match or slightly exceed the user’s popliteal measurement. Multiple solutions exist to raise chair height, from free DIY wood blocks to premium lift recliners, so there’s an option for every budget and need.
Firm support is essential. Avoid soft, plush cushions that collapse under weight, as these make push-off difficult. Always prioritize armrests, stable bases, and non-slip surfaces when selecting or modifying seating.
Safety extends beyond the chair itself. Caregivers should learn proper transfer techniques, and seniors should practice floor-to-stand recovery in a safe environment. Small modifications create significant improvements in independence and confidence. Start with a popliteal height measurement and try a $30 furniture riser or DIY wood lift. If that’s not enough, scale up to powered cushions or full lift chairs. These changes mean never needing help to stand again.