
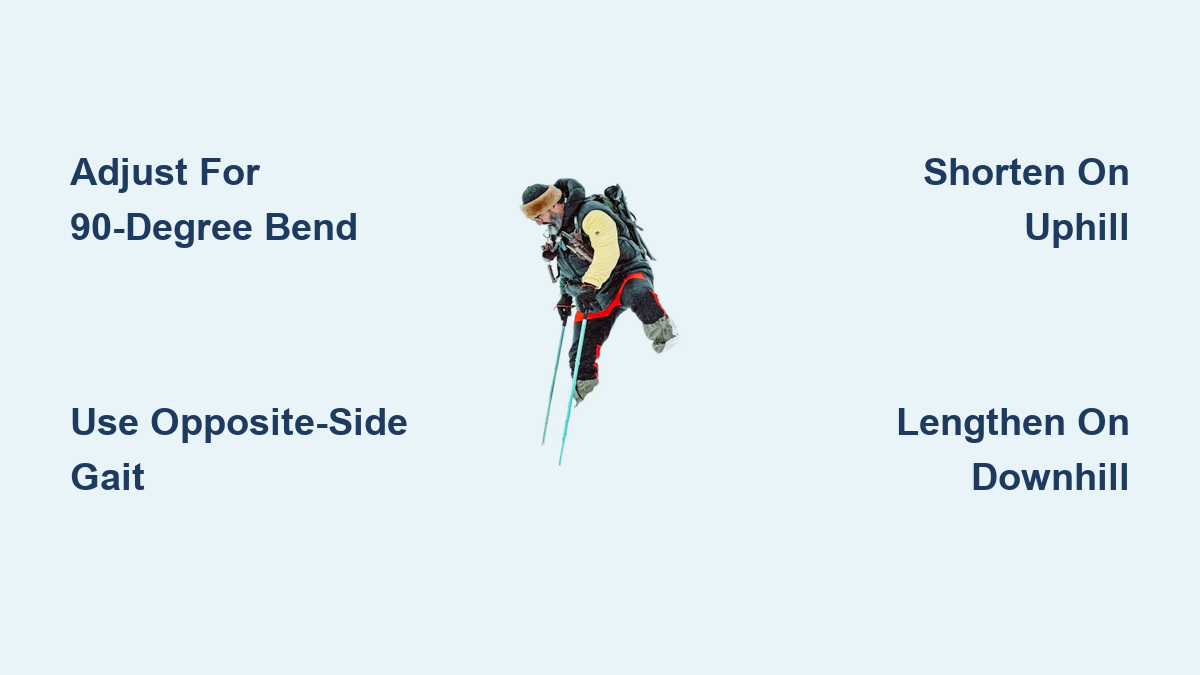
If you’re a senior looking to walk with more stability, reduce joint pain, and boost confidence on trails or sidewalks, trekking poles might be the game-changer you have been missing. Designed to turn your two-point stance into a four-point support system, trekking poles enhance balance, improve posture, and reduce strain on knees and hips, making every step safer and more comfortable.
Used correctly, they are not just for hikers. Thousands of older adults now rely on trekking poles for daily walks, recovery from injury, and outdoor adventures. Research shows they can reduce knee load by up to 35% on downhill slopes and help seniors walk 20 to 50% farther without fatigue. But to get these benefits, you need the right poles, proper technique, and smart adjustments for different terrains.
Choose Senior-Friendly Trekking Poles
Selecting the right trekking poles as a senior requires focusing on ease of use, comfort, and stability rather than ultra-lightweight hiking features. The right poles will feel like natural extensions of your arms, not cumbersome equipment.
Pick Adjustable Poles with Easy Locks
Opt for poles with push-button or clip-lock systems, not twist locks. Twist locks can loosen mid-walk and are harder to operate if you have arthritis or weak grip strength. Push-button locks let you adjust height quickly, even with gloves on, and stay secure during use.
Look for models with a reliable locking mechanism rated for at least 100 to 120 kg of total body weight. Avoid ultra-light folding poles because they sacrifice stability. Instead, choose telescoping aluminum or carbon fiber poles under 1 lb per pair to prevent arm fatigue.
Use Ergonomic Grips and Wrist Straps
Select poles with cork or EVA foam grips. They are soft, absorb sweat, and reduce hand strain. Cork molds slightly to your hand over time, offering a custom fit. Foam is lightweight and cushioned, ideal for sensitive hands.
Grips should include a flange or shelf at the base so your hand rests comfortably without constant gripping. This is crucial if you have tremors or hand fatigue. Pair this with proper wrist straps: insert your hand from below, then grip the handle so the strap supports your wrist and palm. This lets you release the grip temporarily while keeping the pole attached.
Install Flat Rubber Tips for Daily Use
Standard metal spikes are unstable on pavement. Replace them with wide, flat rubber feet, similar to cane tips, for maximum traction on sidewalks, tile, or boardwalks.
Keep these accessories handy:
- Rubber tip protectors to extend metal tip life and protect indoor floors
- Carbide tips for ice, rock, or hard-packed trails
- Snow baskets to prevent sinking in deep snow
- Mud baskets to add stability in wet, slippery conditions
Carry spare tips and baskets in your daypack. They are lightweight and essential when terrain changes.
Set the Correct Pole Height
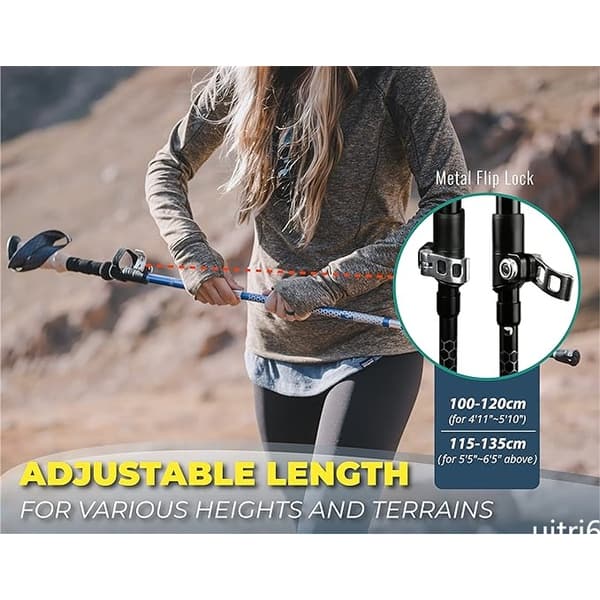
Proper pole height is critical for preventing strain on your shoulders, neck, back, and knees. Getting this right transforms trekking poles from awkward tools into seamless extensions of your body.
Adjust for Flat Ground: 90-Degree Elbow Bend
Stand in your walking shoes on level ground. Hold a pole vertically beside you, tip on the floor. Adjust the length so your elbow bends at 90 to 95 degrees when your hand rests on the grip. This angle ensures optimal leverage and prevents shoulder or back strain.
Most seniors use poles between 110 and 125 cm, depending on height. Use this quick guide:
| Height Range | Suggested Starting Length |
|---|---|
| Under 5’2″ | 105 to 110 cm |
| 5’3″ to 5’7″ | 110 to 115 cm |
| 5’8″ to 5’11” | 115 to 120 cm |
| 6’0″+ | 120 to 125 cm |
Fine-tune based on comfort. If your shoulders hike up or arms feel stretched, adjust accordingly.
Avoid setting poles too long. This forces you to hunch or overreach, defeating the posture benefits.
Modify for Hills and Slopes
Terrain demands real-time adjustments. When going uphill, shorten poles by 5 to 10 cm. This gives better push-off leverage and stops your arms from lifting too high. When going downhill, lengthen poles by 5 to 10 cm. This keeps your torso upright and transfers impact from knees to arms, reducing joint stress by up to 35%.
On side slopes, shorten the pole on the uphill side and lengthen the downhill one. This levels your posture and improves balance. Test first on short uphill and downhill sections before committing to long trails. Adjust until movements feel smooth and strain-free.
Master the Opposite-Side Walking Pattern
The foundation of effective trekking pole use is the reciprocal gait pattern. This natural movement mirrors how your arms and legs work together when walking without poles, creating seamless stability.
Use Diagonal Support for Natural Gait
Walk like you naturally do. Arms swing opposite legs. That is the key. Follow this rule: right leg forward, left pole planted. Left leg forward, right pole planted.
Plant each pole slightly ahead of the opposite foot, aligned with the ball of the foot or heel. As one foot swings forward, the opposite pole stays grounded, providing continuous stability. This reciprocal gait pattern promotes upright posture, even weight distribution, smoother longer strides, and reduced shuffling or hesitation.
Watch your shadow during practice. Arms and legs should move diagonally, not stiffly forward.
Time Pole Strike with Heel Contact
Sync the pole touch-down with the heel strike of the opposite foot. This coordinates upper and lower body movement, improving rhythm and balance. As you push off, angle the pole slightly behind your body to aid forward motion, like pushing off a wall.
Avoid these common mistakes:
- Planting poles too far ahead, which causes overreaching
- Swinging poles too wide, which reduces efficiency
- Holding poles too tightly, which leads to hand fatigue
Practice in a quiet park or hallway. Focus on fluidity, not speed. Most seniors adapt within 1 to 2 weeks of regular use.
Use One Pole for Joint Pain or Weakness

Sometimes you only need one pole. This is particularly useful when one leg is painful or weak from arthritis, surgery, or injury. Using a single pole correctly can reduce load on the affected side by up to 25%.
Apply Cane-Like Technique on Affected Side
If only one leg is painful or weak, use one trekking pole like a cane, but better. Hold the pole in the hand opposite the affected leg. Right knee pain? Use pole in left hand. Left hip replacement? Use pole in right hand.
The walking sequence works like this:
- Step forward with the weaker leg
- Simultaneously plant the pole just ahead of the opposite foot
- Keep both pole and foot grounded until the heel of the strong leg lands
- Push off using both limbs for propulsion
This creates a temporary tripod support, reducing load on the injured side. Never hold the pole on the same side as the weak leg because it increases lateral lean and fall risk.
A trekking pole offers more upper-body engagement than a standard cane, improving overall strength and endurance while you walk.
Boost Stability on Tough Terrain
When the ground gets challenging, your technique needs to adapt. Trekking poles excel in these situations, but only if you know how to use them properly.
Double-Plant Poles for Extra Support
On steep climbs, loose rocks, or slippery logs, plant both poles at once before taking two steps. Use this method when climbing or descending steep trails, crossing streams or mud, or regaining balance after a slip.
This two-point pause gives maximum stability and lets you assess footing before moving. Adjust pole height first: shorten poles for uphill, lengthen for downhill to maintain comfort during double planting.
Cross Streams Safely with Pole Anchoring
Face slightly upstream, plant both poles firmly on the streambed, and shuffle sideways across. Lengthen poles for deeper water to improve reach and balance. Keep three points of contact at all times: two poles and one foot, or two feet and one pole.
If water is above mid-calf or moving fast, reconsider crossing. Use poles to test bottom stability before stepping.
Step Over Logs and Rocks with Confidence
To climb over a rock, plant both poles in front and push down to assist lifting. To step over a log, plant poles behind the log for stability during takeoff and landing. When walking on a log, extend arms out like a tightrope walker. Poles act as counterbalances.
Avoid using poles to pull yourself up from a seated position unless they are designed for that purpose.
Prevent Injury and Maintain Equipment
Trekking poles are assistive tools, not replacements for leg strength or core balance. Using them properly keeps you safe, but misusing them can lead to new problems.
Do Not Over-Depend on Poles
Overuse can lead to wrist, elbow, or shoulder strain. Signs you are over-relying include persistent hand or arm pain, shuffling gait despite using poles, and difficulty walking without them. If discomfort continues, consult a physical therapist. They can assess your gait and suggest modifications or alternative mobility aids.
Clean and Inspect After Every Walk
Maintain your poles like any valuable gear. Wipe down shafts and grips after use. Remove dirt from locks and baskets. Let foam grips and straps air dry to prevent mold. Check monthly for loose locks, worn tips, frayed straps, and bent shafts.
Never use poles with damaged locks or cracked sections because they can collapse unexpectedly.
Replace Worn Parts Promptly
Rubber tips wear down fast on pavement. Replace them when tread is smooth or cracked, when the pole feels wobbly on hard surfaces, or when the metal tip starts showing. Carry spare tips and baskets. Most manufacturers sell replacements separately.
Invest in poles with 5-year warranties or repair programs. Quality models last years. Cheap ones fail quickly.
Adapt Poles for Daily Life and Recovery
Trekking poles are not just for trail hiking. They serve many purposes in everyday senior life, from rehabilitation to active living.
Aid Post-Surgery and Injury Recovery
Trekking poles help safely return to activity after knee or hip replacement, ankle sprains, or ACL or meniscus surgery. They reduce joint loading while promoting natural gait, which is critical for rehabilitation. One study found a hiker used poles to descend more than 7 miles after a hip injury, avoiding rescue.
Ask your physiotherapist before starting. They can tailor pole use to your recovery stage.
Support Neurological and Mobility Challenges
Users with Parkinson disease, post-stroke weakness, or balance disorders benefit from enhanced proprioception, improved rhythm and step initiation, and assistance with sitting and standing. The sensory feedback from pole-ground contact helps users feel more grounded and aware of their body position.
Therapeutic poles like Urban Poling Activator are designed for medical use, with upright posture alignment and high durability.
Frequently Asked Questions About Trekking Poles for Seniors
Are trekking poles better than a cane for seniors?
Trekking poles offer four points of contact compared to a cane’s three, providing superior stability. They promote reciprocal gait patterns and upright posture, whereas canes often cause lateral tilt. Poles are ideal for seniors with mild to moderate balance issues who want natural gait and discretion.
How do I know if my trekking poles are the right height?
Stand upright with poles beside you, tips on the ground. Your elbow should bend at 90 to 95 degrees when your hand rests on the grip. If your shoulders hike up or arms feel stretched, the poles are too long. If you feel hunched or strained, they may be too short.
Can I use trekking poles on pavement and sidewalks?
Yes, but you must replace standard metal spikes with flat rubber tips. These provide traction on hard surfaces and protect both your poles and the ground. Rubber tip protectors also extend the life of metal tips and prevent damage to indoor floors.
Do trekking poles really reduce knee pain?
Research shows trekking poles can reduce knee joint loading by 25 to 30% during flat walking and up to 35% during downhill descent. This makes them particularly beneficial for seniors with osteoarthritis, joint replacements, or chronic lower-body pain.
How long does it take to learn proper trekking pole technique?
Most seniors adapt within 1 to 2 weeks of regular use. Practice in a quiet park or hallway first, focusing on fluidity rather than speed. The opposite-side gait pattern mimics natural walking, so the learning curve is relatively gentle.
Can I use one trekking pole instead of two?
Yes, single-pole use works well for mild imbalance or unilateral joint pain. Hold the pole in the hand opposite the weaker leg. This creates a temporary tripod support system and reduces strain on the affected side by up to 25%.
Key Takeaways for Using Trekking Poles as a Senior
Trekking poles are tools of independence, helping you walk longer, stand straighter, and explore more with less pain and fear. You do not need to be an athlete to benefit from them.
Use the opposite-side gait pattern: right foot forward, left pole planted. Set pole height for a 90-degree elbow bend on flat ground. Shorten poles uphill and lengthen them downhill. Wear wrist straps correctly by inserting your hand from below. Choose adjustable poles with ergonomic grips and flat rubber tips. Double-plant on steep or unstable ground.
View poles as empowerment, not limitation. With the right technique and equipment, trekking poles can transform your daily routine from a cautious shuffle to a confident stride. Whether you are walking in the park, hiking a trail, or recovering from surgery, these simple tools offer real freedom. Start slow, practice regularly, and soon you will wonder how you ever walked without them.