If you’re a senior looking to improve balance, posture, and daily strength, planks are one of the safest and most effective exercises you can do. Unlike crunches or sit-ups, planks do not compress the spine, making them ideal for older adults concerned about osteoporosis, back pain, or joint sensitivity. The good news? You do not need to lie on the floor or hold a 60-second plank to benefit. With proper modifications like wall planks, countertop holds, or kneeling variations, any senior can build core strength at their own pace.
A strong core helps you stand taller, get up from chairs more easily, walk with confidence, and reduce your risk of falls. This guide breaks down exactly how to do planks for seniors, step by step, with safe progressions, form cues, and alternatives if getting on the floor is not an option.
Wall Plank: The Safest Starting Point
The wall plank is the most accessible way for seniors to begin building core strength. It teaches proper alignment without stressing wrists, knees, or the lower back. Because your body weight is significantly reduced, it is perfect for beginners, those with balance issues, or anyone avoiding floor exercises.
How to Perform a Wall Plank
Stand 3 to 4 feet from a sturdy wall, facing it. Place your hands flat on the wall at shoulder height, with fingers spread wide. Step your feet back until your body forms a straight diagonal line from head to heels. Engage your core by gently pulling your belly button toward your spine. Squeeze your glutes and keep your hips level, not sagging or lifted too high. Hold for 2 to 5 seconds, then rest. Repeat 3 times.
Forearm option: If you have wrist pain, rest your forearms on the wall instead, with elbows directly under shoulders.
Tip: Keep your neck neutral with eyes focused slightly ahead of your hands, not up or down.
When to Progress
Once you can hold a wall plank for 30 seconds with good form, move to a countertop or raised surface for a slightly greater challenge.
Countertop and Chair Plank Variations

The countertop plank reduces body load while mimicking the angle of a floor plank. It is ideal for early-stage core training and builds confidence before moving to lower surfaces.
How to Do a Countertop Plank
Place hands or forearms on a sturdy kitchen counter. Walk your feet back until your body forms a straight diagonal line. Keep your core tight, shoulders over wrists or elbows, and hips level. Hold for 5 to 10 seconds, then rest. Complete 3 sets.
Chair Plank: A Bridge to Floor Work
Using a chair or bench allows gradual progression with minimal joint strain. Place your forearms or hands on the seat of a stable chair. Push the chair against a wall if needed for extra stability. Step your feet back into a plank position, keeping your body in a straight line. Engage your core, keep glutes tight, and avoid sagging hips.
Tip: Use the forearm version if your wrists are sensitive.
Progress test: Hold for 1 minute, then consider a kneeling floor plank if safe and comfortable.
Kneeling Floor Plank: First True Floor Variation
The kneeling plank is the first true floor variation and offers excellent core activation with joint protection.
Step-by-Step Knee Plank Instructions
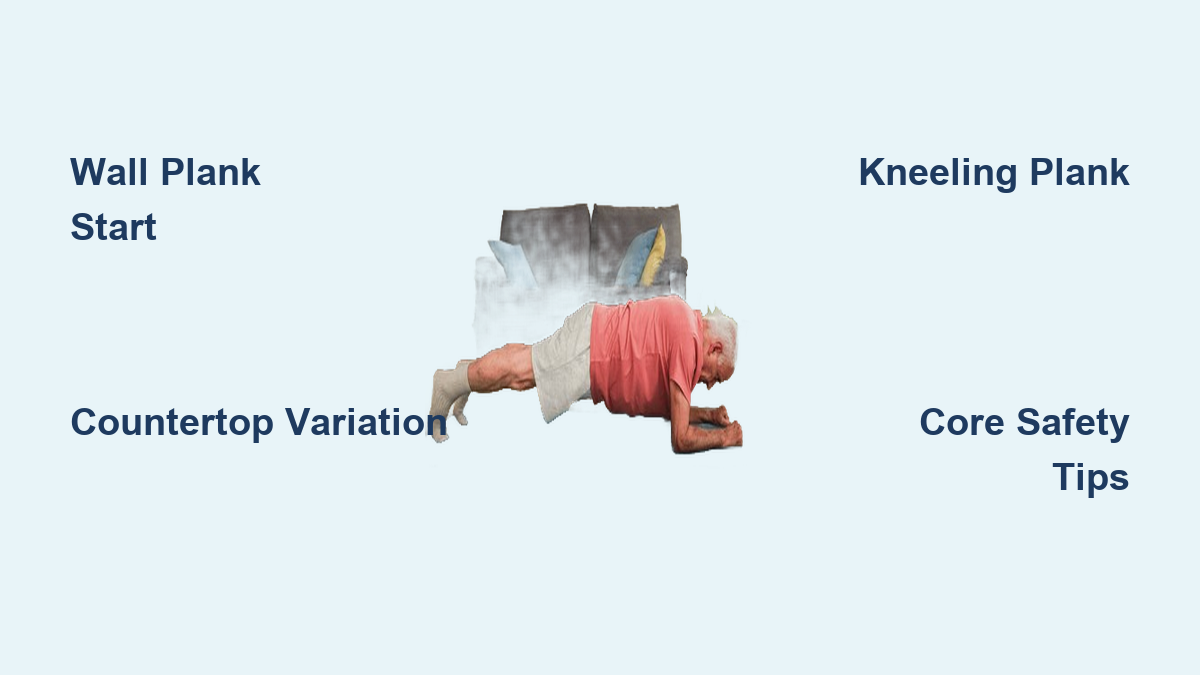
Start on hands and knees, with wrists under shoulders and knees under hips. Shift your weight forward onto your shins, not your kneecaps. Place a folded towel or yoga mat under shins for cushioning. Engage your core, squeeze your glutes, and align your head, spine, and hips. Hold for 2 to 5 seconds, rest, and repeat 3 times.
Forearm version: Lower onto forearms with elbows under shoulders for an easier variation that is gentler on wrists.
Common Mistakes to Avoid
Do not let your lower back sag. Keep your core braced and glutes tight. Do not lift your buttocks too high, as your body should form a straight line, not a V shape. Do not hold your breath. Breathe steadily in and out. Do not crane your neck. Keep your gaze slightly forward, not upward.
Progress: Hold for 30 seconds with control before advancing to a full plank.
Full Plank Variations for Stable Seniors

For seniors with good joint stability and core control, the full high plank builds functional strength.
High Plank on Hands and Toes
Start on hands and knees. Step one foot back, then the other, balancing on the balls of your feet. Keep your body in a straight line with head, spine, hips, and heels aligned. Shoulders should be over wrists, core engaged, and glutes tight. Breathe steadily and avoid holding your breath.
Duration: Start with 5 to 10 seconds, 3 sets. Build up by 5 seconds weekly.
Warning: If your lower back sags or you feel shoulder strain, return to a kneeling or elevated plank.
Forearm Plank on Toes
This version increases core demand and deep abdominal activation. Begin in a kneeling forearm plank. Step your feet back so your body is supported on forearms and toes. Maintain a straight line from head to heels. Push your hips slightly down to engage the transverse abdominis.
Pro tip: Add small hip extensions by lifting one leg a few inches to activate glutes and improve walking mechanics.
Dynamic Plank Movements for Better Function
High-Knee Plank for Bone Health
This modified push-up motion builds upper body strength and provides weight-bearing benefits critical for osteoporosis prevention. Start in high plank. Bend elbows slightly and lower your chest toward the floor, keeping knees slightly bent. Push back up to full plank. Keep elbows close to your body to protect your shoulders.
Reps: Start with 5 to 10, and increase as strength improves.
Shoulder Taps for Stability
This builds anti-rotational core strength and shoulder control. From high plank, slowly lift one hand to tap the opposite shoulder. Return your hand and repeat with the other side. Keep your hips still. Only your arms should move.
Start with: 5 taps per side, 2 sets.
Make it easier: Perform on knees or use a low step to tap.
Proper Form: What to Do and Avoid
Key Form Cues for All Planks
Engage your core by bracing as if preparing for a light punch. Squeeze your glutes and quads to stabilize your pelvis and protect your lower back. Keep your spine neutral with head, neck, and spine aligned. Breathe steadily and never hold your breath. Keep your hips level in line with shoulders and heels. Pull your shoulders down and pinch shoulder blades slightly to protect joints.
Common Mistakes to Stop
Stop sagging in your back, which is a sign of a weak core. Drop to an easier variation if this happens. Stop lifting your buttocks too high, which shifts effort away from your core. Stop allowing your wrists to collapse. Switch to forearms or use yoga blocks if needed. Stop craning your neck. Keep your gaze slightly forward, not up. Stop pushing through pain. Stop immediately if you feel joint or back discomfort.
Form check: Place a water bottle on your lower back. If it falls, your hips are sagging or lifting. Adjust your form.
Safe Modifications for Joint Pain
Wrist pain: Use forearm plank or wall plank to eliminate wrist extension.
Knee sensitivity: Use a cushioned mat or do wall planks to reduce pressure on kneecaps.
Shoulder instability: Avoid floor planks and use wall or countertop variations to reduce joint load.
Cannot get on or off the floor: Use standing hip extensions or seated core work to avoid floor transitions.
Balance concerns: Use a chair for support or do wall plank to increase safety.
Pro tip: Place a chair nearby when doing floor planks and use it to push up safely.
Progression Plan: Build Strength Gradually
Step-by-Step Progression Ladder
Start with wall plank. Move to countertop plank. Advance to chair plank. Progress to kneeling floor plank. Try full high plank. Attempt forearm plank on toes. Finally, add dynamic variations like shoulder taps and walk-ups.
Sample 8-Week Plan
Weeks 1 to 2: Wall plank, 3 sets of 5 seconds. Weeks 3 to 4: Countertop plank, 3 sets of 8 seconds. Weeks 5 to 6: Kneeling plank, 3 sets of 10 seconds. Weeks 7 to 8: Increase hold by 5 seconds weekly and aim for 30 seconds.
Rule: Only advance when you can hold the current version for 30 to 60 seconds with perfect form.
Duration Goals
Beginner goal is 2 to 10 seconds. Intermediate goal is 20 to 30 seconds. Advanced goal is 1 minute, which is the maximum recommended.
Note: Holding longer than 1 minute offers minimal extra benefit. Focus on quality, not time.
Seated and Standing Alternatives
For seniors who cannot safely get on or off the floor, seated core work builds foundational strength.
Seated Core Exercises
Try seated marches by lifting knees alternately while bracing your core. Do torso twists by rotating your upper body side to side with hands clasped. Practice heel taps by tapping heels forward while pulling your belly in. Perform abdominal bracing by pulling your navel toward your spine and holding for 5 to 10 seconds.
Frequency: 3 to 5 times per week, 2 to 3 sets.
Standing Hip Extension
This reinforces glute activation and core control without floor work. Stand behind a chair with hands on the backrest. Keeping your torso still, lift one leg straight back. Squeeze your glutes at the top, hold 1 to 2 seconds, and lower. Repeat 10 to 15 times per leg.
Benefits: Improves walking stability and reduces fall risk.
Safety First: Who Should Avoid Floor Planks
While planks are generally safe, some seniors should avoid full floor versions or consult a doctor first. This includes those with osteoporosis or spinal fractures, shoulder or rotator cuff injuries, wrist arthritis or carpal tunnel, knee pain or joint replacements, balance disorders or fall history, or obesity or limited floor mobility.
Safety tips: Use elevated surfaces whenever possible. Protect joints with cushions or forearm modifications. Stop immediately if you feel pain, dizziness, or breath-holding. Consult a physical therapist if you have chronic conditions.
Frequently Asked Questions About Planks for Seniors
Can seniors with osteoporosis do planks?
Seniors with osteoporosis should avoid full floor planks and consult a doctor first. Wall planks, countertop planks, and seated core exercises are safer alternatives that still build strength without compressing the spine.
How long should a senior hold a plank?
Beginners should start with 2 to 10 seconds. Intermediate practitioners can aim for 20 to 30 seconds. Advanced seniors can work toward 1 minute. Holding longer than 1 minute offers minimal additional benefit.
Are planks safe for seniors with knee pain?
Yes, but modifications are essential. Use wall planks, countertop planks, or kneeling planks with cushioning under shins. Avoid full floor planks if getting up and down is difficult. Place a chair nearby for support when attempting any floor variation.
What is the easiest plank variation for seniors?
The wall plank is the easiest and safest starting point. It reduces body weight load, teaches proper alignment, and eliminates stress on wrists, knees, and the lower back.
How often should seniors practice planks?
Practice 2 to 3 times per week for muscle recovery. Daily practice is acceptable for low-intensity versions like wall planks if form remains consistent. Short, frequent sessions yield better results than occasional long ones.
Can planks help prevent falls in seniors?
Yes, planks build core strength that improves balance and postural control, reducing fall risk. The weight-bearing variations also stimulate bone density, which is beneficial for bone health.
Key Takeaways for Safe Plank Practice
Start where you are and use modifications freely. Wall planks, countertop planks, and kneeling planks are all effective and safe for seniors. Prioritize perfect form over duration. A 5-second plank with proper technique is more beneficial than a 30-second plank with poor form. Progress gradually and only advance when you can hold your current variation for 30 to 60 seconds with control. Stop immediately if you feel pain, dizziness, or breath-holding. Combine planks with other exercises like seated marches, bridges, or heel taps for full-body functional fitness. Even 5 minutes daily of modified planks maintains core strength and supports independence, balance, and long-term well-being.