If you’re a senior looking to build arm strength, improve posture, and make daily tasks easier without straining your joints, wall push-ups are one of the safest and most effective exercises you can do. Unlike floor push-ups, wall push-ups reduce pressure on knees, hips, and shoulders while still strengthening your chest, arms, and core. This simple, equipment-free movement helps you stand up from chairs, carry groceries, open doors, and maintain balance with greater ease. In just minutes a day, you can boost functional strength, support heart health, and gain confidence in your mobility. Whether you’re new to exercise or returning after a break, this guide shows you exactly how to perform wall push-ups correctly, avoid common mistakes, modify for comfort, and progress safely over time.
Proper Wall Push-Up Form for Seniors
Mastering correct technique ensures you get the most benefit while protecting your joints and spine. Follow these steps to perform wall push-ups with precision and control.
Starting Position Setup
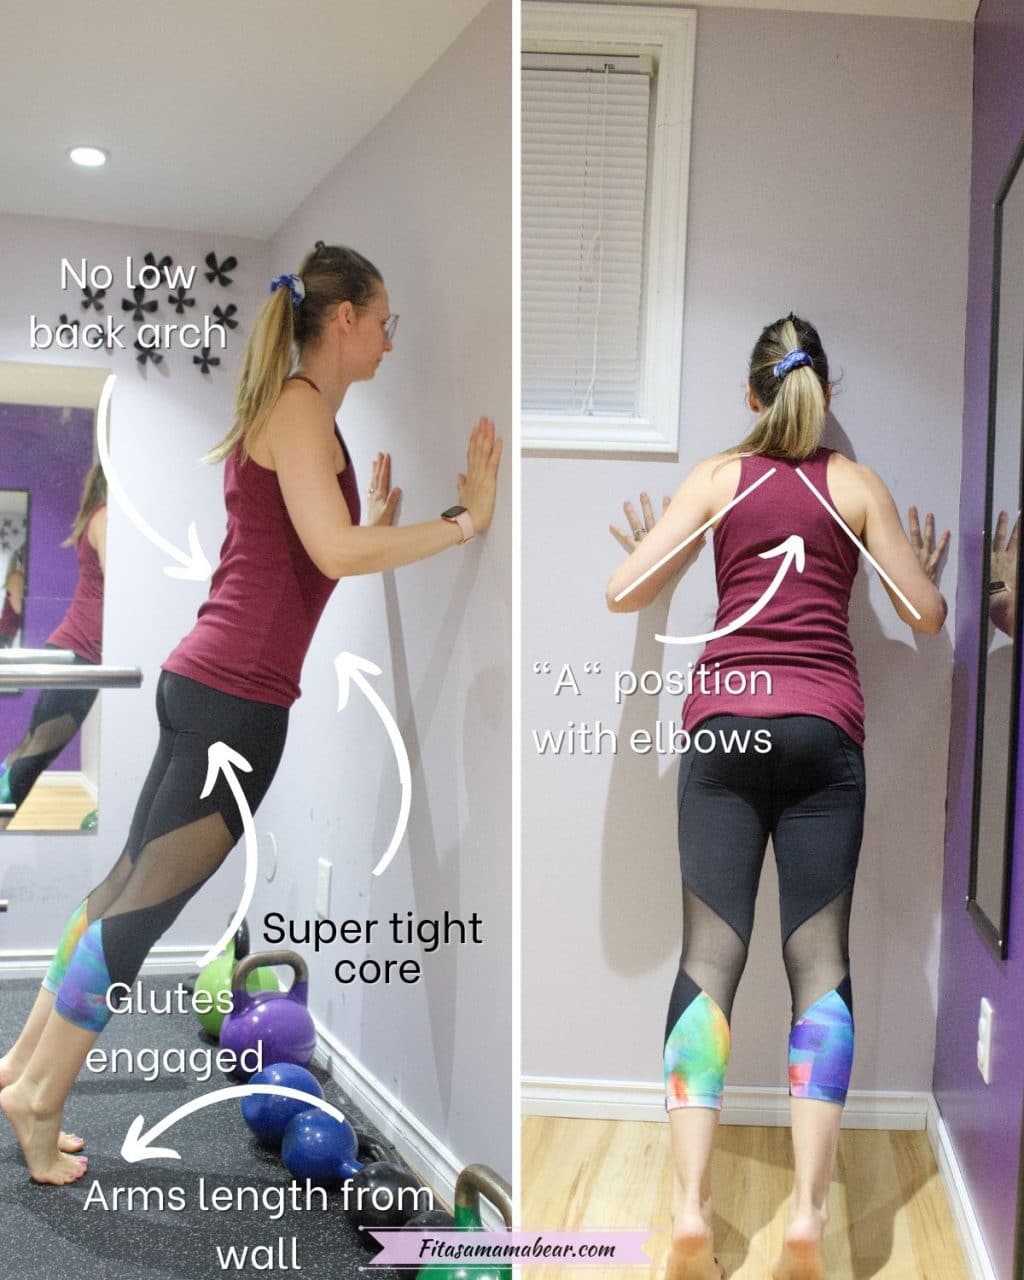
Stand facing a sturdy, non-slip wall with feet hip- to shoulder-width apart and heels flat on the floor. Step forward until you’re about one arm’s length away, roughly 24 to 36 inches depending on your height. Place both hands on the wall at shoulder or chest height, slightly wider than shoulder width, about 1.5 times. Keep fingers pointing forward or slightly inward with palms fully pressed into the wall. Align your wrists directly under your shoulders to avoid strain.
Body Alignment Checklist
Maintain a straight line from head to heels, like a standing plank. Engage your core by gently pulling your belly button toward your spine and activating your pelvic floor. Tuck your pelvis slightly to prevent arching your lower back. Keep your neck neutral with eyes forward, chin slightly tucked, and ears in line with shoulders. Pull your shoulders down and back, avoiding shrugs, to activate your upper back muscles and stabilize your shoulder blades.
Controlled Lowering Phase
Inhale slowly as you bend your elbows to 45 degrees and lower your chest toward the wall. Move in a 3-second descent, leading with your chest, not your head. Stop just before your nose or forehead touches the wall. Pause for 1 second at the bottom to increase muscle engagement and joint stability.
Powerful Push-Back Phase
Exhale as you press through your palms to straighten your arms. Focus on pushing the wall away to activate your chest and triceps. Fully extend your arms without locking your elbows. At the top, spread your shoulder blades apart to fully engage the serratus anterior, the key muscle for shoulder health and posture.
Breathing and Core Engagement for Seniors
Proper breathing enhances performance, stability, and cardiovascular safety, which is especially important for seniors with high blood pressure or heart concerns.
Sync Breath with Movement
Inhale during the lowering phase over 3 seconds, and exhale during the push-back over 2 seconds. This rhythm prevents breath-holding, which can spike blood pressure. Steady breathing also improves endurance and focus throughout your workout.
Activate Deep Core Muscles
On each exhale, gently tighten your transverse abdominis and pelvic floor. This internal bracing supports your spine, reduces lower back strain, and improves balance. If you feel neck discomfort, press your tongue lightly to the roof of your mouth. This cue helps align your head and spine naturally without strain.
Recommended Sets, Reps, and Frequency
Start with a manageable routine and build gradually to avoid fatigue and injury while building sustainable strength.
Beginner Routine
Perform 1 to 2 sets of 5 to 10 repetitions, 2 to 3 times per week on non-consecutive days such as Monday, Wednesday, and Friday. Rest 30 to 60 seconds between sets. Use a slow tempo with 3 seconds down, 1-second pause, and 2 seconds up. Consistency over 4 to 6 weeks typically results in noticeable strength gains that you can feel in daily activities.
Intermediate Progression
Once 10 reps feel easy, increase to 2 to 3 sets of 10 to 15 reps. You can extend the lowering phase to 4 seconds for greater muscle challenge. Maintain the same weekly frequency to allow for recovery and muscle adaptation between sessions.
Common Mistakes and Fixes for Wall Push-Ups
Avoid these frequent errors to protect your joints and maximize results from your wall push-up practice.
Arching the Lower Back
Arching increases pressure on lumbar discs and weakens core engagement. Fix this by gently tucking your pelvis and drawing your belly button in. Imagine a straight rod running from your heels to your head as you perform each rep.
Forward Head Position
A forward head position strains neck muscles and cervical spine. Keep ears aligned with shoulders. Use the tongue-on-roof trick to reinforce proper head posture throughout the movement.
Flaring Elbows Out
Flaring puts excess stress on shoulder joints and increases risk of impingement. Keep elbows at a 45-degree angle to your body, like a tight push-up position, to protect your shoulders.
Rushing the Motion
Rushing reduces muscle activation and control. Slow down and count 3-2-1 as you lower, pause, then push back in 2 seconds. Controlled reps build more strength than fast, sloppy ones.
Shrugging Shoulders
Shrugging overworks the upper traps and underuses the chest and arms. Before starting, pull your shoulders down and back. Maintain this position throughout every repetition.
Lifting Heels
Lifting heels reduces balance and stability. Press your heels firmly into the floor. Wear non-slip shoes or stand on a rubber mat for better traction.
Easier Modifications for Beginners
If standard wall push-ups feel too hard, these adjustments reduce difficulty while still building strength effectively.
Step Closer to the Wall
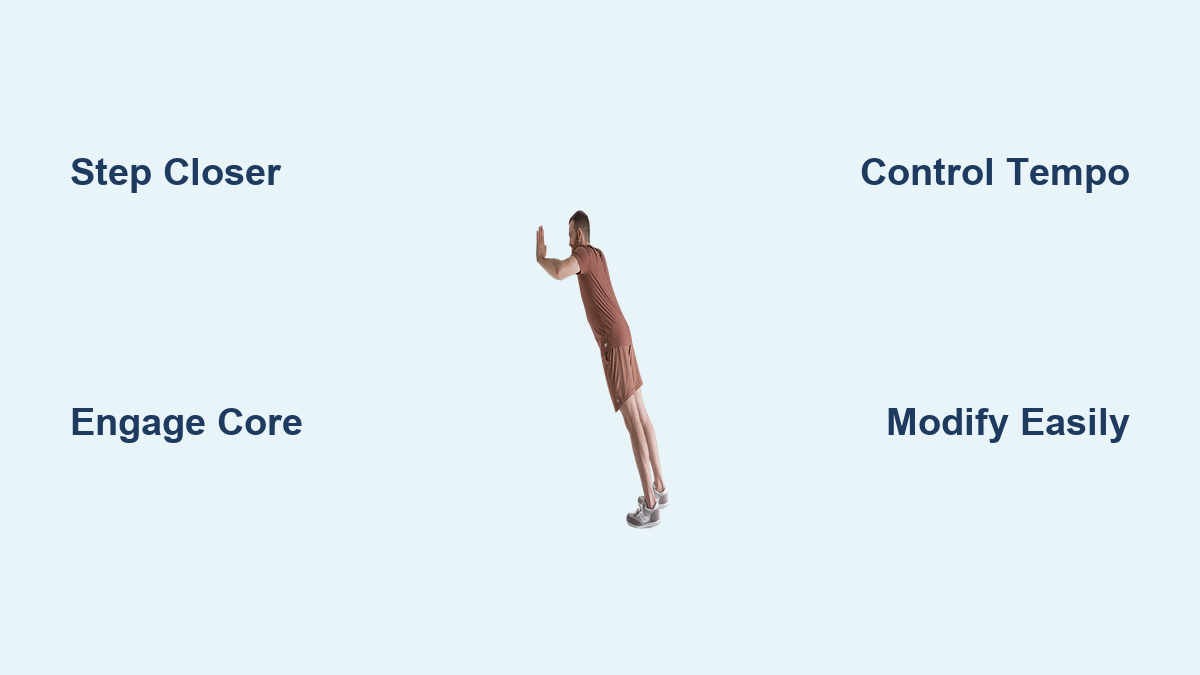
Move your feet just 12 to 18 inches from the wall. This decreases the incline so you’re supporting less of your body weight. This modification is ideal for those with weakness, joint pain, or limited mobility.
Reduce Range of Motion
Only lower halfway toward the wall. This builds confidence and neuromuscular control before attempting full repetitions. You can gradually increase depth as strength improves.
Widen Your Stance
Place feet slightly wider than shoulder-width. This lowers your center of gravity and improves balance, especially if you feel unsteady during the movement.
Use One Hand for Support
Rest one hand lightly on a counter or chair while doing push-ups with the other arm. This is great for asymmetrical strength or balance issues that affect your stability.
Cushion or Adjust Wrists
If wrists hurt, place a folded towel or yoga mat under your palms. Alternatively, make a fist and press your knuckles into the wall to reduce wrist extension and discomfort.
Slight Knee Bend
Gently bend your knees if balance is a concern. Just keep your torso upright and core engaged throughout the movement for maximum benefit.
Progression Path to Greater Strength
As you gain strength, gradually increase difficulty to keep building muscle and functional ability.
Step-Back Progression Ladder
Move through these levels only when the current one feels controlled and comfortable, typically after 2 to 4 weeks of consistent practice.
• Wall push-up with feet close provides minimal resistance and serves as the easiest starting point.
• Wall push-up with feet back increases load as you step further from the wall.
• Countertop push-up uses hands on counter at waist height for steeper angle and more resistance.
• Table push-up places hands on a sturdy table for even steeper positioning.
• Chair push-up uses hands on a sturdy chair with body leaning forward.
• Knee push-up is performed on hands and knees with floor-based partial support.
• Full floor push-up represents the advanced level with full body weight.
Advanced Variations for Fit Seniors
These variations challenge stronger seniors who have mastered the basic wall push-up.
• Feet further back from the wall creates greater challenge and increased resistance.
• Close-hand diamond push-up targets triceps with hands close under the chest.
• One-arm wall push-up builds unilateral strength with one hand on wall and other behind back.
• One-leg push-up increases balance demand by lifting one leg during movement.
• Low-wall push-up places hands below shoulder level for harder leverage.
• Plyometric push-up pushes hard enough to lift hands briefly off the wall, but only with doctor approval and excellent control.
Muscles Worked and Functional Benefits
Wall push-ups are not just about stronger arms. They enhance real-life mobility and independence for seniors in meaningful ways.
Primary Muscles Strengthened
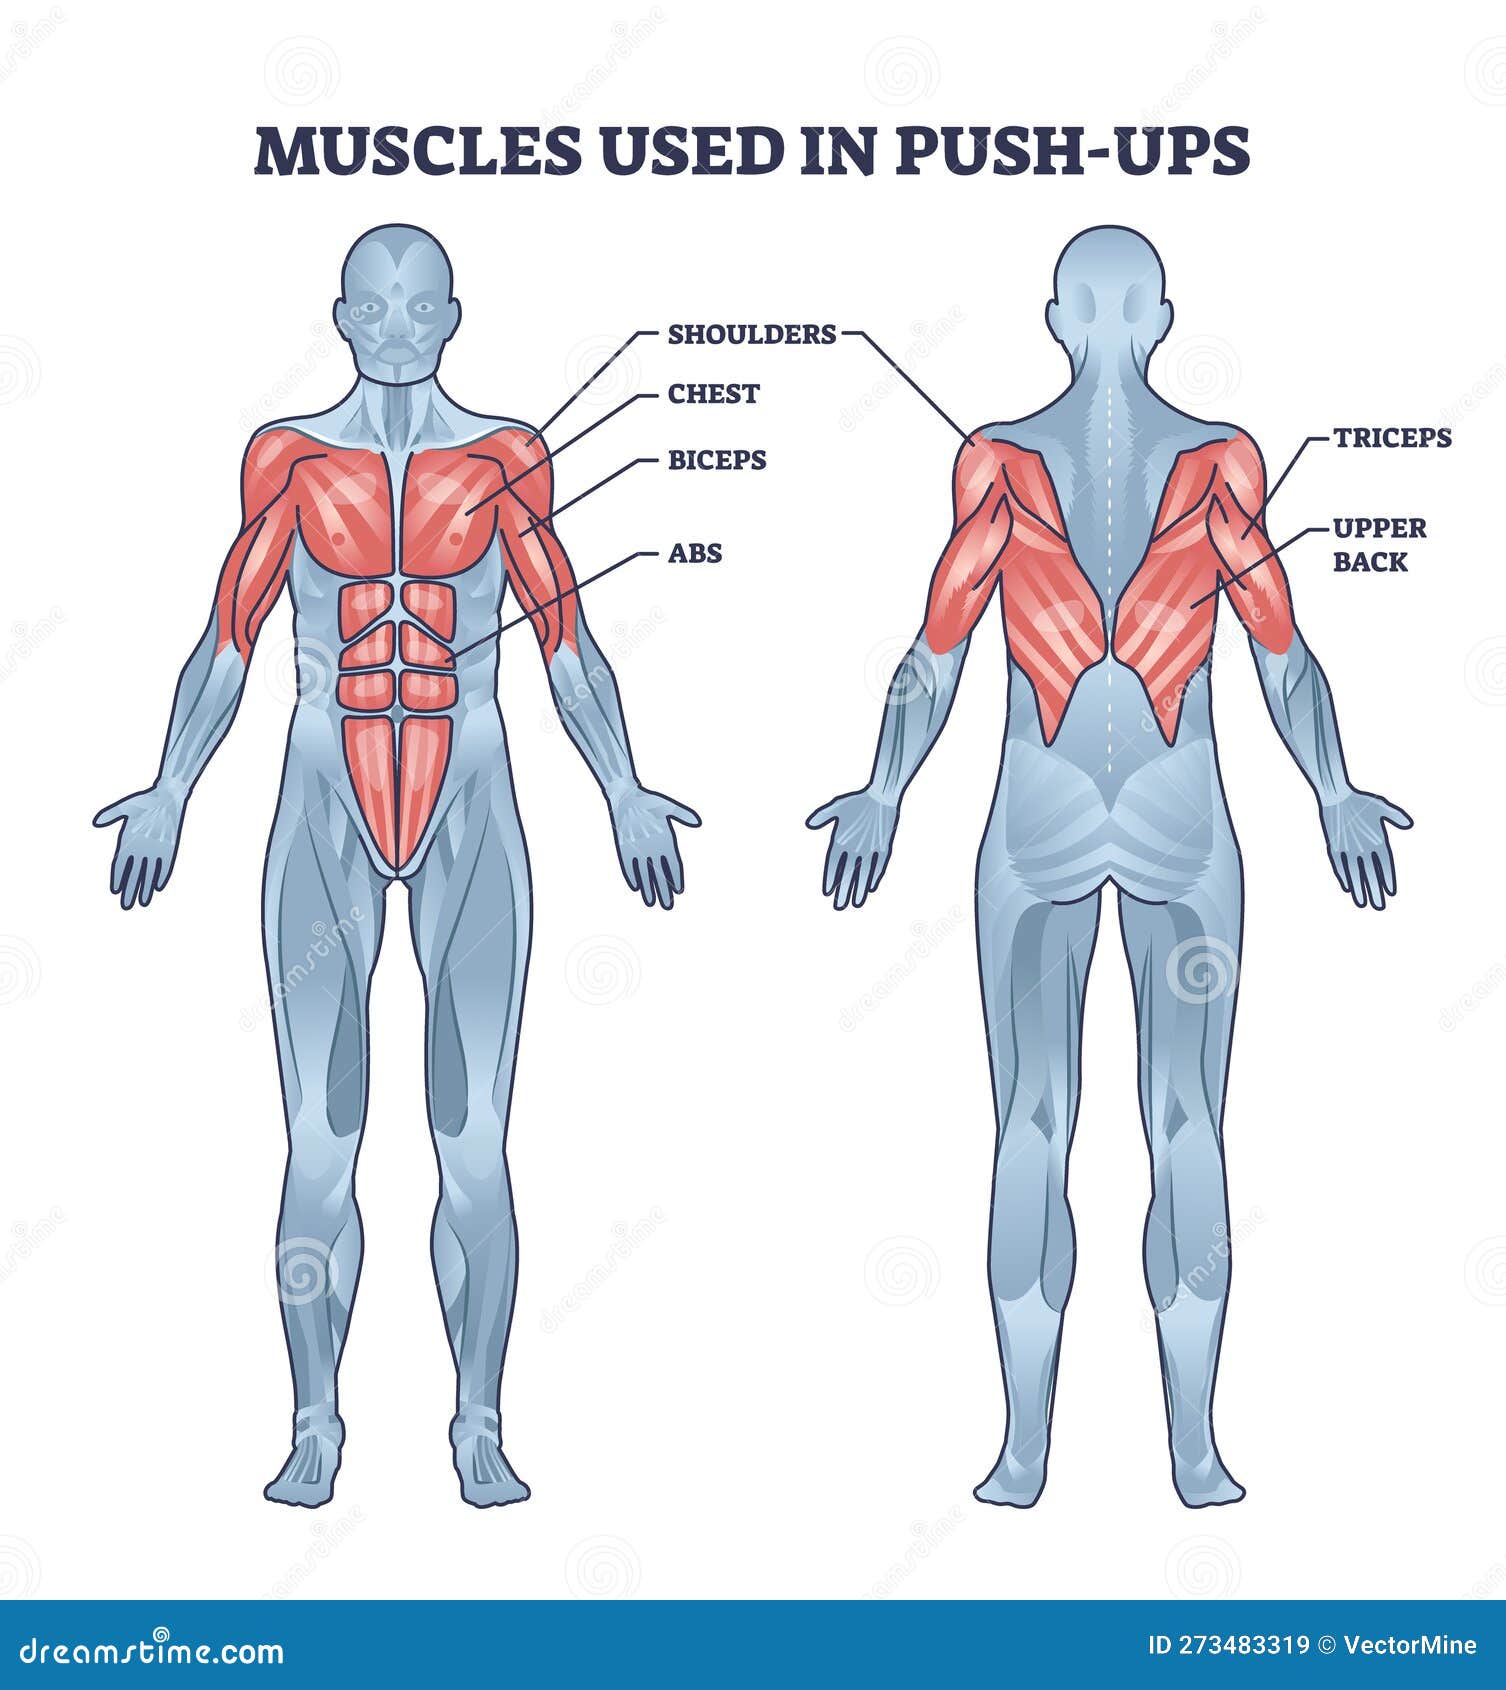
The pectoralis major powers pushing motions like rising from a chair. Anterior deltoids help with reaching and lifting overhead. Triceps extend the elbows for pushing and carrying. Serratus anterior keeps shoulder blades stable and prevents winging that leads to poor posture.
Secondary and Stabilizing Muscles
The core, including transverse abdominis and obliques, stabilizes the spine and improves balance. Rhomboids and trapezius retract shoulder blades and support upright posture. Rotator cuff muscles stabilize the shoulder joint during movement. Legs and glutes maintain standing posture and overall stability.
Real-World Functional Gains
Wall push-ups make transfers easier, helping you push up from chairs, toilets, or beds with less effort. They improve mobility aid use so you can propel walkers or wheelchairs more efficiently. You’ll develop better carrying strength for grocery bags, laundry, or luggage. Enhanced balance recovery lets you push off walls during near-falls. Greater overhead reach helps you access high shelves without strain. Reduced daily fatigue means you can stand and move with more endurance throughout the day.
Safety Guidelines and When to Stop
Wall push-ups are safe for most seniors, but precautions are essential for a positive experience.
Conditions That Require Caution
Shoulder injury or rotator cuff tear means you should avoid this exercise or perform it only under physical therapy guidance. Wrist arthritis or pain responds well to knuckle push-ups or padded surfaces. High blood pressure or heart disease requires continuous breathing and never holding your breath. Vertigo or balance issues mean you should stand closer to the wall, widen your stance, and have support nearby. Osteoporosis or spinal fracture risk requires keeping your spine neutral and avoiding excessive forward lean. Recent surgery means you should always consult your doctor before starting.
Stop Immediately If You Feel
Sharp joint pain in shoulders, wrists, or back signals you should stop immediately. Dizziness, lightheadedness, or shortness of breath requires ending the session. Chest pain or discomfort means you must stop and seek medical attention. Loss of balance or instability indicates you should rest and reassess.
Daily Integration Tips for Seniors
Make wall push-ups a natural part of your routine for lasting results and consistent progress.
Build a Habit
Do one set in the morning and one at night near a hallway or bathroom wall. Use wall push-ups as a movement break after sitting for 30 minutes or more, such as after meals or television. Pair with other standing exercises including calf raises, shoulder rolls, or arm circles for a complete routine.
Combine with Breathing
Add 30 seconds of deep diaphragmatic breathing after your set. Inhale through your nose, expand your belly, and exhale slowly. This supports relaxation, circulation, and blood pressure control.
Track Progress
Keep a simple log recording the date, sets and reps completed, how it felt (easy, moderate, or hard), and any modifications used. Seeing improvement builds motivation and confidence over time.
Key Takeaways for Wall Push-Ups and Senior Fitness
Wall push-ups are more than an exercise. They are a practical tool for maintaining independence and resilience in later life. With no equipment needed and minimal joint stress, they are ideal for seniors at any fitness level. Start with just 5 to 10 reps, 2 to 3 times per week, and focus on perfect form with a straight body line, tight core, elbows at 45 degrees, and breath in sync. Modify by stepping closer to the wall if needed, and progress only when you feel ready. Pair wall push-ups with stretching like a doorway chest stretch for balanced mobility. Stay consistent because real strength and functional gains come with time and repetition. With each push, you are not just building muscle. You are building the ability to live stronger, safer, and more self-reliant every day.
Frequently Asked Questions About Wall Push-Ups for Seniors
Are wall push-ups safe for seniors with arthritis?
Wall push-ups are generally safe for seniors with arthritis because they eliminate pressure on knees, hips, and spine. However, if you have wrist arthritis, use knuckle push-ups or place a padded surface under your palms. Always consult your doctor before starting any new exercise program.
How many wall push-ups should a senior do per day?
Start with 5 to 10 repetitions per set, 2 to 3 sets per day, 2 to 3 times per week. As strength improves, gradually increase to 10 to 15 reps per set. Quality matters more than quantity, so focus on proper form over high repetition counts.
Can wall push-ups help seniors get up from a chair easier?
Yes, wall push-ups strengthen the pectoralis major, triceps, and anterior deltoids, which are the same muscles used to push up from a chair. Regular practice makes this daily transition easier and reduces reliance on arms or assistance from others.
Do wall push-ups improve balance for seniors?
Wall push-ups engage core muscles including the transverse abdominis and pelvic floor, which directly contribute to improved balance and fall prevention. The exercise also strengthens legs and glutes that maintain standing posture and stability.
What is the easiest way to modify wall push-ups for beginners?
Step closer to the wall, about 12 to 18 inches away, to decrease the incline and reduce the percentage of your body weight supported by your arms. You can also reduce your range of motion by only lowering halfway toward the wall until strength builds.