
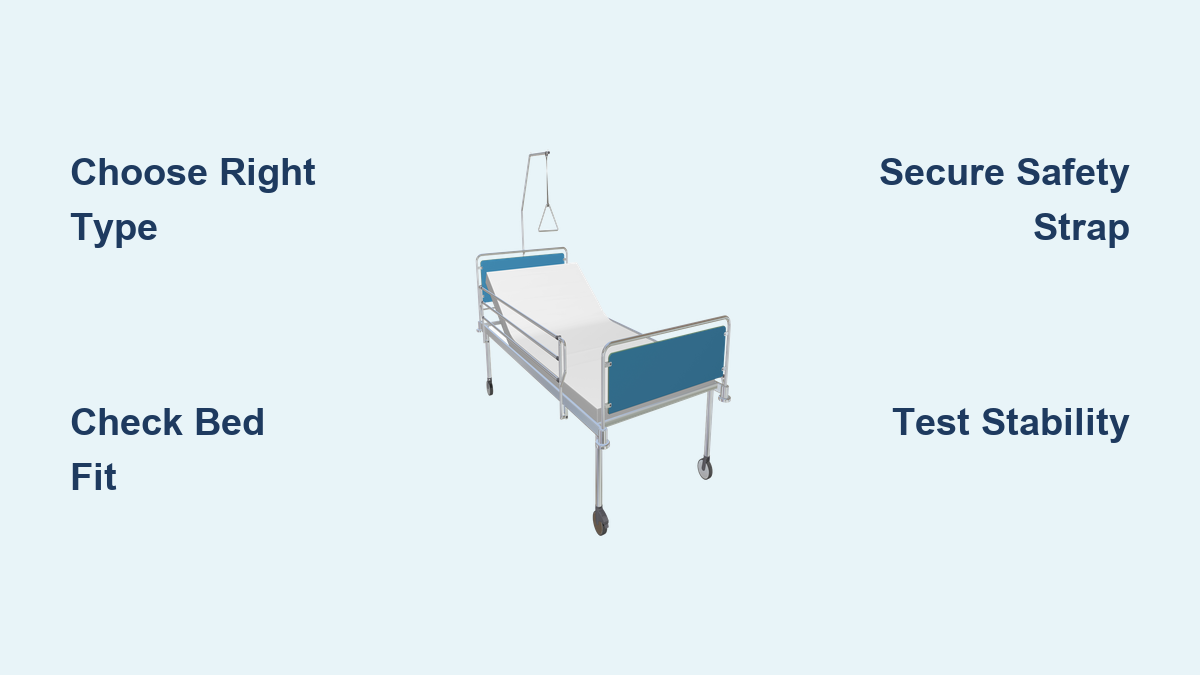
If you’re caring for an aging loved one or preparing for post-surgery recovery, installing a bed rail for the elderly can be a game-changer. These simple yet effective mobility aids help seniors sit up, reposition, and safely get in and out of bed, reducing fall risk and boosting confidence. But how to install bed rail for elderly users correctly is critical for safety and stability. A poorly installed rail can wobble, shift, or even collapse under pressure. This guide walks you through every step, from choosing the right type to final safety checks, so you can ensure secure, reliable support exactly when it is needed most.
Choose the Right Bed Rail Type for Your Situation

Selecting the correct bed rail depends on the user’s mobility level, bed setup, and intended use. Using the wrong type can compromise safety and make the rail ineffective.
Match Rail Type to Mobility Needs
For seniors who can stand with minimal assistance, basic fixed rails offer sturdy support for sitting up and repositioning. These models use a U-shaped base that slides under the mattress and box spring, with adjustable legs that touch the floor for stability. Caregivers assisting with transfers often prefer swing-away rails like the Health Craft Smart Rail. These feature an arm that lifts up and out of the way, allowing unobstructed access to the bed. Users transferring from wheelchairs benefit most from transfer rails, which are curved or angled for natural reach and attach directly to the bed frame with clamps or brackets.
Avoid Full-Length Side Rails
Transfer Master and other experts strongly advise against full-length side rails due to entrapment hazards. Limbs or the head can slip into gaps between the rail and mattress, especially in hospital beds. Instead, opt for half-length rails that cover only the upper portion of the bed. They provide enough grip for sitting up and standing while minimizing entrapment risk. Portable assist rails are ideal for temporary recovery or travel, offering basic repositioning help without permanent installation.
Check Bed Compatibility Before Purchasing
Installing a bed rail starts long before unpacking the box. Bed type and height determine compatibility, and choosing the wrong rail for your bed will result in instability.
Confirm Bed Frame and Mattress Fit
Most basic and swing-away rails require a box spring to anchor the base rail between the mattress and foundation. If your bed uses a solid platform, verify the model supports platform beds. Brands like EZ Adjust design rails specifically for this setup. For beds without box springs, use frame-attached or strap-secured models that bypass compression-based designs and clamp directly to the bed frame for stability.
Measure Bed Height Accurately
Standard bed height ranges from 20 to 25 inches. If your mattress sits above 28 inches, standard footed rails may not reach the floor. In this case, choose foot-less or swing-away models that rely on frame attachment rather than floor contact. Use a tape measure from floor to top of mattress before purchasing. Soft or sagging mattresses can also reduce effective height and destabilize compression rails, so only use models rated for soft surfaces.
Gather Required Tools and Parts
Preparation prevents frustration during installation. Most bed rails come with all necessary components, but missing a tool can delay setup.
Inventory Included Components
Common parts in standard kits include the top handrail (often padded), U-shaped base rail, vertical support bars, adjustable feet or legs, push pins or locking clamps, an Allen wrench (usually 3/32 inch), and a safety strap. For the Lunderg Pro model, expect additional features like a motion-sensor LED light (USB rechargeable), glow-in-the-dark snap band, storage pouch, frame strap with key-lock buckle, and adhesive magnets for relocating the light.
Prepare Your Workspace
Clear space around one side of the bed. Remove pillows and bedding for easier access. Have a screwdriver and USB cable nearby if your rail includes lighting features.
Install Basic and Swing-Away Bed Rails
Most slide-under rails follow the same core installation process. Accuracy ensures long-term stability and safe use.
Position Rail at Head of Bed
Place the rail near the edge of the pillow, aligned with the head of the bed. This positioning matches natural movement when sitting up and reaching for support.
Slide Base Rail Under Mattress
With help if needed, lift the mattress and slide the U-shaped base rail between the mattress and box spring. Ensure it sits flush with the outer edge of both layers. Gaps can cause pinching or instability. Avoid twisting or forcing the rail, as this may damage the frame or compress the mattress unevenly.
Attach and Adjust Top Rail
Connect the vertical supports to the base and top rail. For adjustable models like the Smart Rail, use the 3/32-inch Allen wrench to set height. Choose a setting that allows comfortable grip when seated. Extend the adjustable feet until they make firm contact with the floor. Uneven floors may require slight adjustments to prevent wobbling.
Secure with Safety Strap
Attach the black webbing strap from a clip on the rail to the opposite bed frame. Buckle securely and tighten until taut. Tuck excess strap under the mattress. While the rail functions without the strap, this accessory adds critical lateral stability, especially on slippery floors or soft mattresses.
Assemble Lunderg Bed Assist Rail
The Lunderg model offers advanced features but requires precise assembly. Follow each step carefully for a secure setup.
Connect L-Bars to Upper U-Bar
Insert the short ends of the L-bars into the upper U-bar. Ensure the light-holder faces outward for easy access. Lock in place with push-button fasteners.
Attach Under-Bed U-Bar
Slide the under-bed U-bar (with built-in safety strap) onto the lower ends of the L-bars. Make sure the red safety cleats face upward, as they prevent the mattress from slipping off the base.
Install Safety Locks
Insert two keyed locks into the holes on the under-bed U-bar. Hand-tighten, then fully secure with the key or screwdriver. Repeat for the upper U-bar. These locks prevent accidental disassembly and keep the structure rigid during use.
Set Up LED Safety Light
Charge the motion-sensor LED light via USB. Switch to Auto mode, as it activates when motion is detected in darkness. Slide the light into the holder on the upper bar, where internal magnets hold it in place. Use the adhesive magnets to relocate the light to a wall or nightstand if preferred.
Secure Frame Strap
Place the frame strap under the mattress on the rail side. Cross diagonally to the opposite bed frame. Unclip, wrap around the frame, re-clip, and lock with the key. Tighten until taut and tuck excess under the mattress. Keep the key attached to the storage pouch with the lanyard, as losing it can make future adjustments difficult.
Mount Transfer Master Half Rails
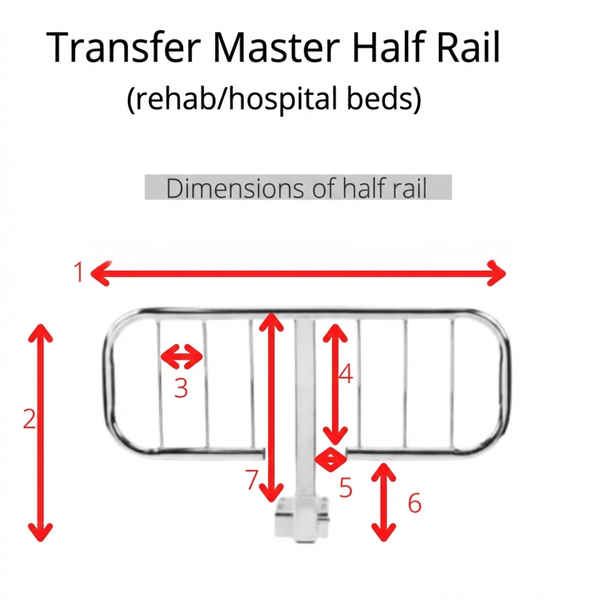
These rails require frame attachment, making them ideal for tall or specialty beds that cannot accommodate slide-under models.
Attach Brackets to Bed Frame
Use the provided hardware to mount clamps or brackets to the bed frame. Position them near the top third of the bed for optimal reach during sitting and standing. Ensure the clamp fits snugly around the frame rail, as loose brackets cause wobbling.
Install the Rail and Test Stability
Slide the half rail into the bracket or clamp. Confirm it is secure and does not wobble. Some models allow height adjustment, so set it so the handle is easy to grasp when seated. Apply moderate downward and sideways pressure to test stability. Inspect for sharp edges or protrusions. Confirm the mattress has border protection to prevent entrapment.
Test Stability and Finalize Setup
Never skip the post-installation safety check. Stability prevents accidents and ensures the rail functions properly when needed.
Conduct a Pressure Test
Push gently on the rail in multiple directions. It should not wobble, shift, or lift from the base. If it does, recheck base rail seating under the mattress, adjust feet for full floor contact, tighten all locks and clamps, and re-tighten the safety or frame strap.
Verify User Accessibility
Sit on the bed and simulate sitting up and grabbing the rail. The handle should be within easy reach, not too high or low. Adjust height if possible. Ensure the rail does not block access to the nightstand or walking path.
Supervise First Use
Watch the user’s first few attempts. Confirm they can grip comfortably and use the rail without overreaching or losing balance. Offer light assistance if needed. Bed rails are mobility aids, not fall-prevention devices, and they do not eliminate fall risk, especially for disoriented or agitated users.
Maintain and Monitor Over Time
A one-time installation is not enough. Regular maintenance ensures long-term safety and reliability.
Inspect Weekly
Check all connections, locks, and straps for looseness or wear. Re-tighten push pins and clamps every few months or after heavy use. Look for frayed safety straps, cracked plastic components, loose or bent rails, and worn padding. Replace damaged parts immediately.
Clean Properly
Wipe down the rail weekly with a damp cloth and mild soap. Avoid harsh chemicals or abrasives that can degrade finishes or weaken materials.
Monitor Weight Limits
Standard rails support up to 300 pounds. Heavy-duty models go up to 500 pounds. Exceeding the limit risks structural failure. Weigh the user if uncertain about capacity.
Optimize for Nighttime Safety
Many falls occur at night. Enhancing usability in the dark protects users during vulnerable moments.
Use Motion-Sensor Lighting
The Lunderg LED light turns on automatically when motion is detected. Position it to illuminate the path to the bathroom without causing glare. Alternatively, use a bedside motion light or glow tape on the floor.
Position for Easy Access
Ensure the rail does not interfere with turning on a lamp or grabbing glasses. Keep the path clear of rugs or obstacles.
Avoid Common Installation Mistakes
Even small errors compromise safety. Knowing what to avoid prevents dangerous mistakes.
Skipping the Safety Strap
Some users skip the strap for a cleaner look, but it prevents lateral movement. This is especially important on hardwood or tile floors.
Installing on Sagging Mattresses
Soft or sagging mattresses reduce compression force, making slide-under rails unstable. Only use models rated for soft surfaces.
Ignoring Bed Height
Using a footed rail on a tall bed above 28 inches leaves feet dangling. No floor contact means no stability. Switch to a swing-away or frame-mounted model.
Over-Tightening Plastic Components
Hand-tighten plastic locks and clamps. Over-tightening with tools can crack them.
When to Seek Professional Help
While most rails install in 5 to 15 minutes, some situations require support.
Consult Manufacturer Support
If unsure, contact the brand. Lunderg support responds within 24 hours at questions@lund.com.
Involve an Occupational Therapist
For users with complex mobility needs, occupational therapists can recommend the best rail type and placement.
Key Takeaways for Installing Bed Rails for Elderly
Installing a bed rail for the elderly is a simple act with profound impact. Done right, it restores independence, reduces caregiver strain, and makes nightly routines safer. Choose the right type based on the user’s mobility needs and bed configuration. Follow the installation steps carefully, test stability thoroughly, and secure all components including safety straps. Maintain the rail regularly by checking connections, cleaning surfaces, and monitoring weight limits. Whether using a basic slide-under model or a high-tech assist rail with lighting, precision in setup ensures reliability when it matters most.
Frequently Asked Questions About Installing Bed Rails for Elderly
What is the best type of bed rail for elderly users who need help sitting up?
Basic fixed rails or swing-away rails work best for sitting up assistance. Basic rails slide under the mattress and offer stable support, while swing-away rails allow easier bed access. Choose based on whether the user needs unobstructed entry or consistent grip support.
Can I install a bed rail on a platform bed without a box spring?
Yes, but you need the right type. Use frame-attached or strap-secured models instead of compression-based slide-under rails. These clamp directly to the bed frame for stability.
How do I know if my bed is too tall for a standard bed rail?
If your mattress top is above 28 inches from the floor, standard footed rails will not reach the floor. Measure from floor to mattress top before purchasing. If above 28 inches, choose foot-less or swing-away models that attach to the frame instead.
Are bed rails safe for preventing falls?
Bed rails are mobility aids, not fall-prevention devices. They help users sit up, reposition, and get out of bed more safely, but they do not eliminate fall risk. Supervision remains essential, especially for disoriented or unsteady users.
How often should I inspect the bed rail after installation?
Inspect weekly for loose connections, worn straps, or damaged components. Re-tighten locks and clamps every few months or after heavy use. Replace any frayed straps or cracked parts immediately.
Do I need a professional to install a bed rail?
Most bed rails install in 5 to 15 minutes with basic tools. However, seek professional help if the bed is an unusual size, the user has complex mobility needs, or you are unsure about compatibility. Manufacturer support and occupational therapists can also provide guidance.